Master Principal Solutions Architect
With over 20+ years of experience focused on Oracle Database, PostgreSQL, SQL Server, MySQL, BigData & Analytics. I have a deep understanding of the latest database trends and technologies especially Oracle Cloud Infrastructure and AWS along with vector databases.
Introduction: Change Data Capture (CDC) is a technique used to track changes in a database, such as inserts, updates, and deletes. In this blog post, we will show you how to implement a custom CDC in PostgreSQL to track changes in your database. By using a custom CDC, you can keep a record of changes in your database and use that information in your applications, such as to provide a history of changes, track auditing information, or trigger updates in other systems
Implementing a Custom CDC in PostgreSQL: To implement a custom CDC in PostgreSQL, you will need to create a new table to store the change information, create a trigger function that will be executed whenever a change is made in the target table, and create a trigger that will call the trigger function. The trigger function will insert a new row into the change table with the relevant information, such as the old and new values of the record, the time of the change, and any other relevant information.
To demonstrate this, we will show you an example of a custom CDC for a table called “employee”. The change table will be called “employee_cdc” and will contain columns for the timestamp, employee ID, old values, and new values of the employee record. The trigger function will be executed after an update on the “employee” table and will insert a new row into the “employee_cdc” table with the relevant information. Finally, we will show you how to query the “employee_cdc” table to retrieve a list of all changes that have occurred in the “employee” table since a certain timestamp.
Create the Employee and CDC table
To store the CDC information, you need to create a new table in your PostgreSQL database. In this example, we will create a table called “employee”, “employee_cdc”, “employee_audit” with the following columns:
CREATE TABLE employee (
id SERIAL PRIMARY KEY,
name VARCHAR(100) NOT NULL,
department VARCHAR(50) NOT NULL,
salary NUMERIC(10,2) NOT NULL,
hire_date DATE NOT NULL
);
In this table, “id” is an auto-incremented primary key, “timestamp” is a timestamp with time zone to store the time of the change, “employee_id” is the primary key of the employee record that was changed, and “old_values” and “new_values” are text columns to store the old and new values of the employee record, respectively.
To capture the changes in the employee table, you will need to create a trigger function that will be executed whenever a record is inserted, updated, or deleted in the table. The trigger function will insert a new row into the “employee_cdc” table with the relevant information. Here is an example trigger function:
CREATE OR REPLACE FUNCTION employee_cdc() RETURNS TRIGGER AS $$
BEGIN
IF (TG_OP = 'UPDATE') THEN
INSERT INTO employee_cdc (timestamp, employee_id, old_values, new_values)
VALUES (now(), NEW.id, row_to_json(OLD), row_to_json(NEW));
INSERT INTO employee_audit (employee_id, old_values, new_values)
VALUES (NEW.id, row_to_json(OLD), row_to_json(NEW));
END IF;
RETURN NULL;
END;
$$ LANGUAGE plpgsql;
This trigger function uses the “row_to_json” function to convert the old and new values of the employee record into JSON strings, which are then stored in the “old_values” and “new_values” columns of the “employee_cdc” table. The “NOW()” function is used to get the current timestamp.
4. Create the trigger
Now that the trigger function has been created, you need to create the trigger on the “employee” table that will call the function whenever a record is updated. You can create the trigger with the following command:
CREATE TRIGGER employee_cdc_trigger
AFTER UPDATE ON employee
FOR EACH ROW
EXECUTE FUNCTION employee_cdc();
4. Query the CDC table
In your application code, you can query the “employee_cdc” table to get a list of all changes that have occurred since a certain timestamp. For example, to get all changes since January 1st, 2023, you can use the following SQL query:
SELECT * FROM employee_cdc
WHERE timestamp >= '2023-01-01 00:00:00';
You can then process these changes as needed in your application code.
Conclusion: In this blog post, we have shown you how to implement a custom Change Data Capture (CDC) in PostgreSQL to track changes in your database. By using a custom CDC, you can keep a record of changes in your database and use that information in your applications. Whether you are tracking changes for auditing purposes, providing a history of changes, or triggering updates in other systems, a custom CDC is a useful tool to have in your PostgreSQL toolkit.
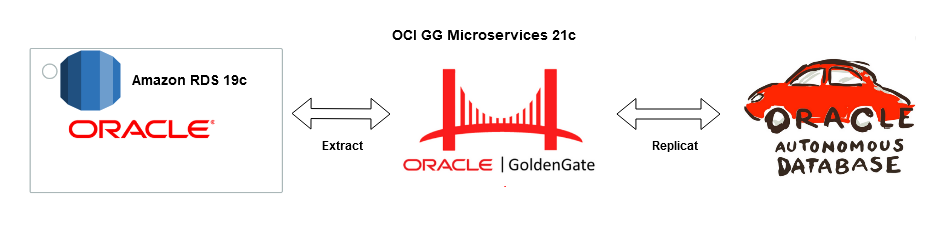
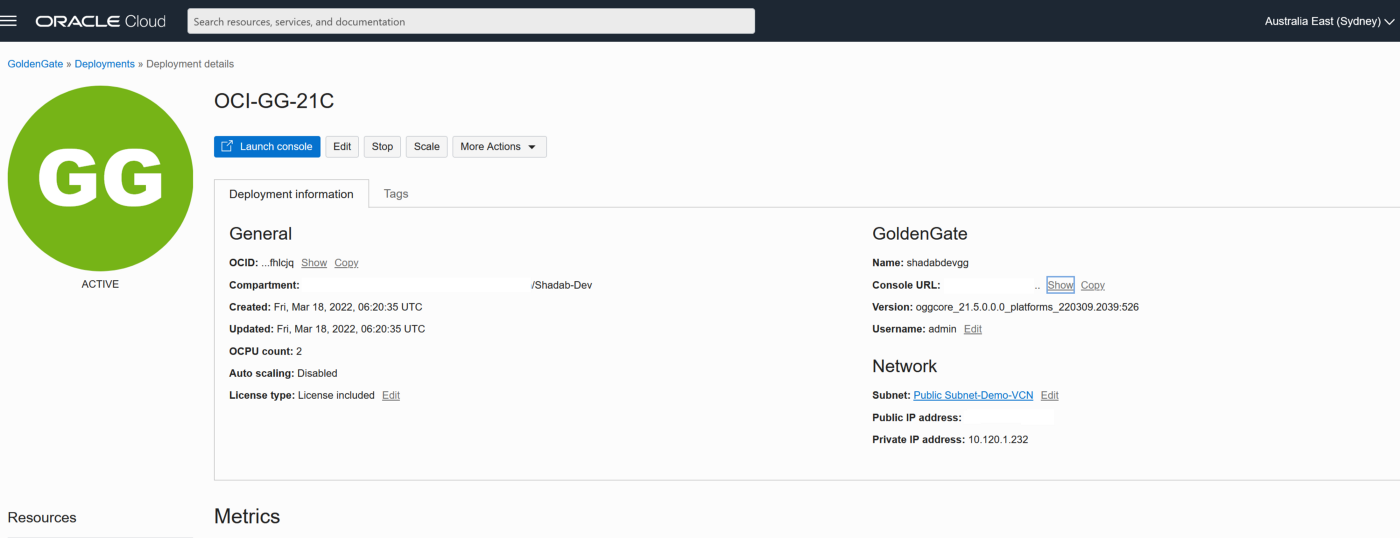
Goldengate Microservices 21c is the latest version of the microservices architecture which makes creating data mesh and data fabric across different public clouds as easy as a few clicks. Goldengate is available on OCI as a fully managed service with auto-scaling. It does not.require installation of Goldengate software at either the source or Target db instances. Goldengate uses a capture and apply mechanism for replication using trail files. Both the extract (capture) and replicat (apply) processes run on the Goldengate replication instance which acts as a hub.
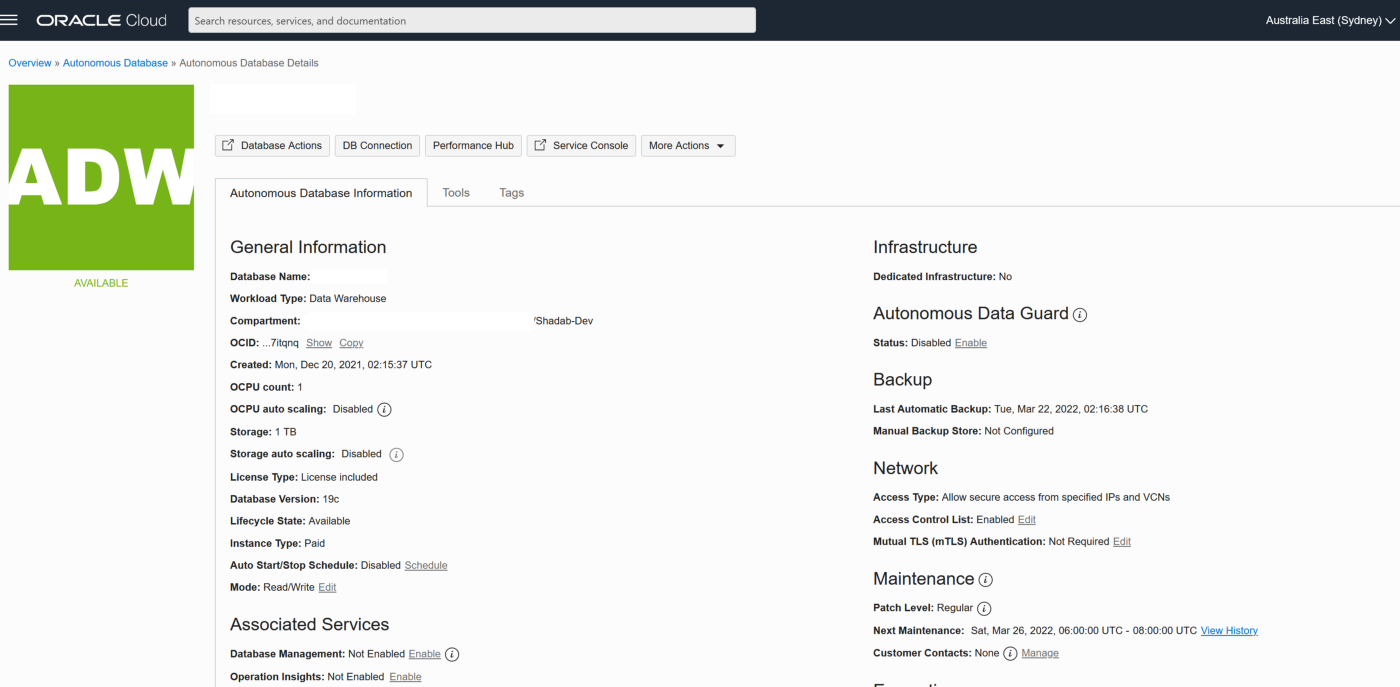
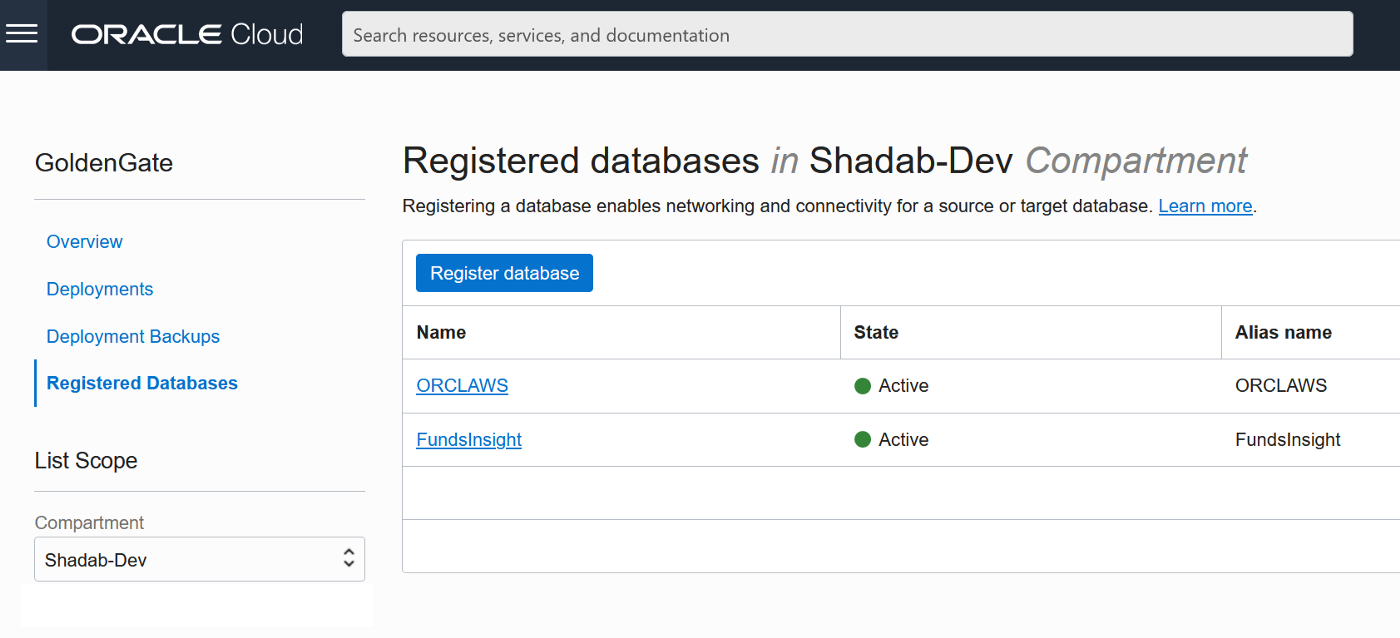
Let us go ahead and create a data pipeline for replicating Data in real-time using Oracle Cloud Infrastructure (OCI) Goldengate 21c from Amazon RDS Oracle Instance to an Oracle Autonomous database in OCI. Below are some of the common use cases for this solution :
Use Cases
Cross-cloud replication of Oracle Database from AWS RDS to OCI
Migration of Oracle Database with Zero Downtime from AWS RDS to OCI
Creating Multi-Cloud Microservices Application with Oracle database as the persistent data store
Creating a Multi-cloud Data Mesh for Oracle Database
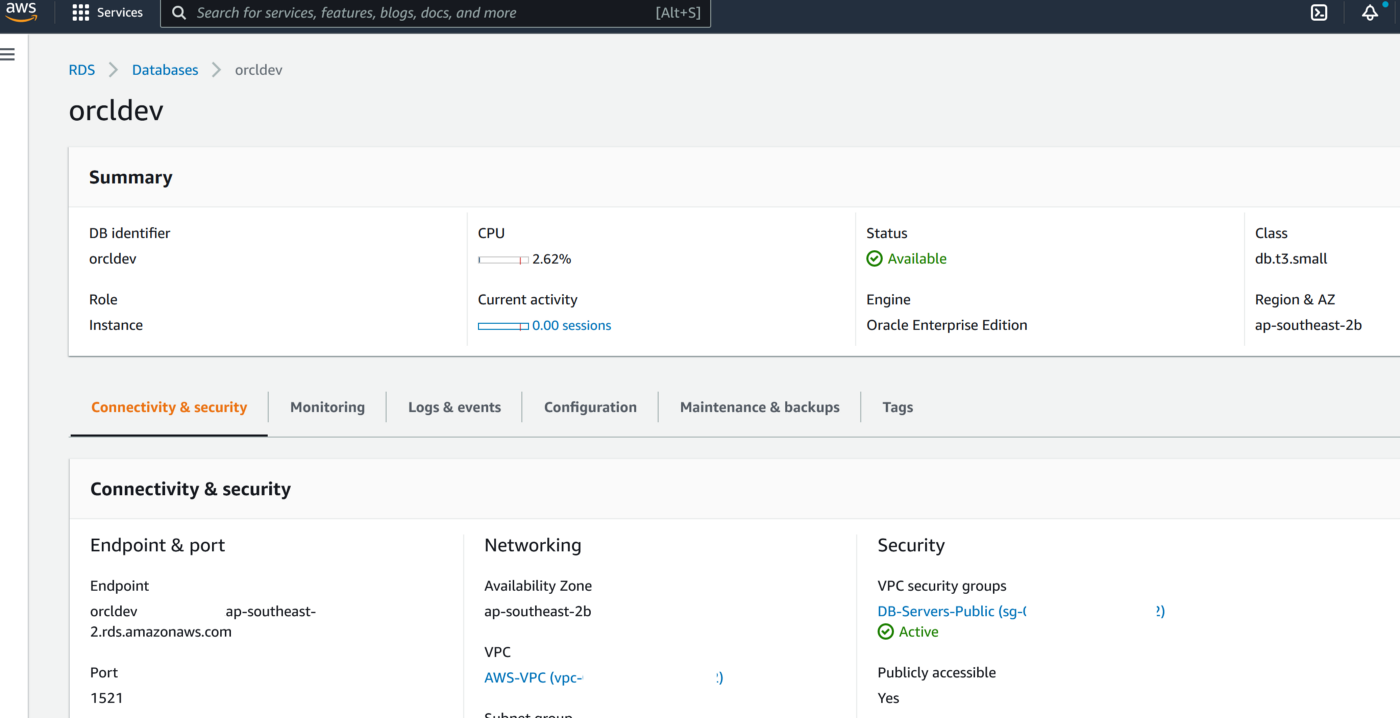
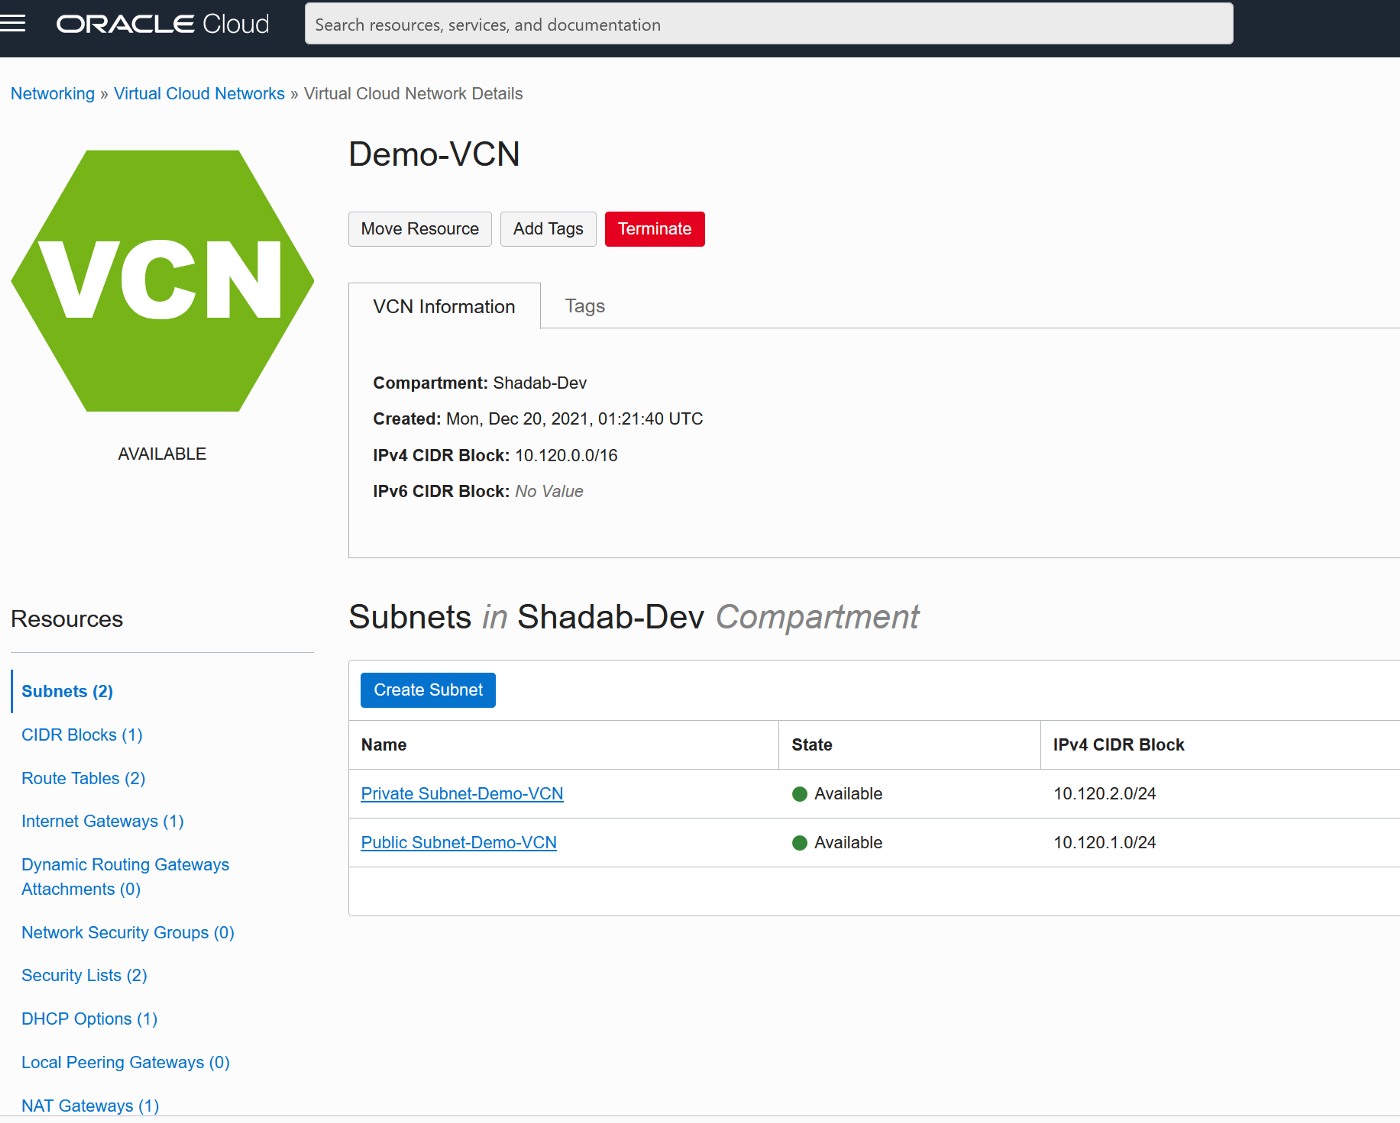
The first part of the setup requires us to provision a VPC, Subnet Group and Oracle 19c RDS Instance on AWS. Please ensure all the requistie Network constructs like security groups are in place for connectivity from OCI Goldengate to RDS. In a production scenario it would be betetr to have the RDS instance without a public endpoint and have a Fastconnect setup from AWS to OCI
Create a VPC and RDS Subnet Group
2. Create RDS Oracle Instance 19.1 EE with super user as ‘admin’
3. Create a new DB Parameter Group for 19.1 EE with parameter ENABLE_GOLDENGATE_REPLICATION set to TRUE
4. Change the parameter group of the RDS instance and reboot the RDS Oracle instance once the parameter group has been applied. Double-check to confirm the parameter ENABLE_GOLDENGATE_REPLICATION is set to True and the correct parameter group is applied to the RDS isntance
5. Set the log retention period on the source DB with ‘admin’ user
grant EXECUTE_CATALOG_ROLE to admin WITH ADMIN OPTION;
commit;
8. Finally, grant the privileges needed by a user account to be a GoldenGate administrator. The package that you use to perform the grant, dbms_goldengate_auth or rdsadmin_dbms_goldengate_auth, depends on the Oracle DB engine version.
— With admin user on RDS Oracle instance for Oracle Database version lower than 12.2 —
— For Oracle DB versions that are later than or equal to Oracle Database 12c Release 2 (12.2), which requires patch level 12.2.0.1.ru-2019–04.rur-2019–04.r1 or later, run the following PL/SQL program.
To revoke privileges, use the procedure revoke_admin_privilege in the same package.
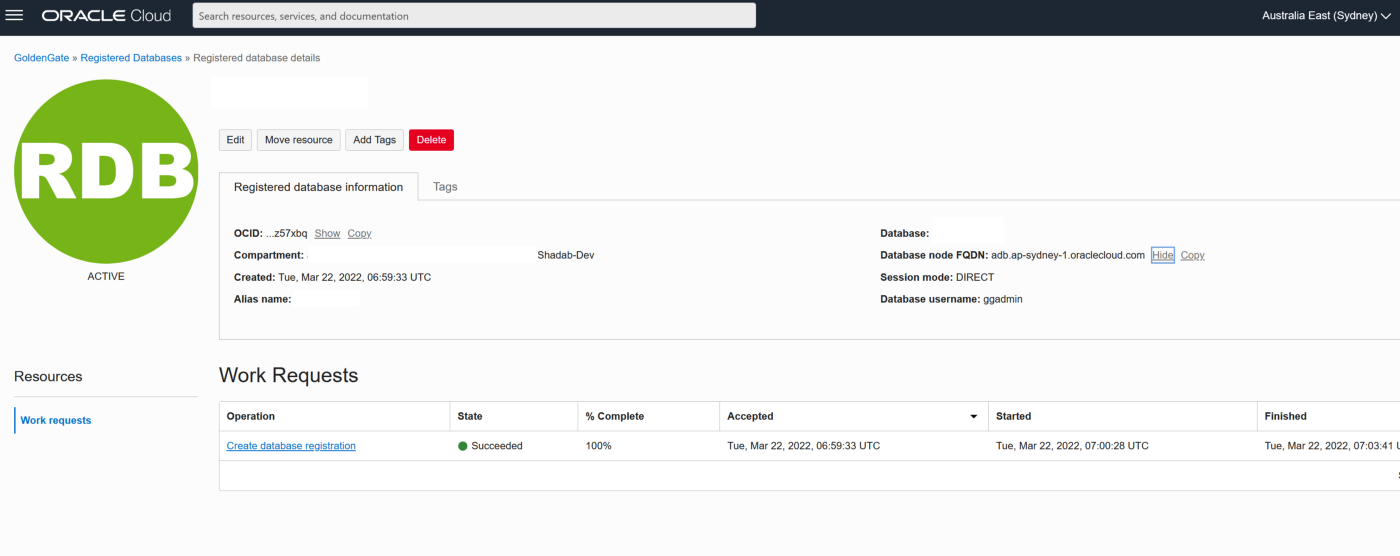
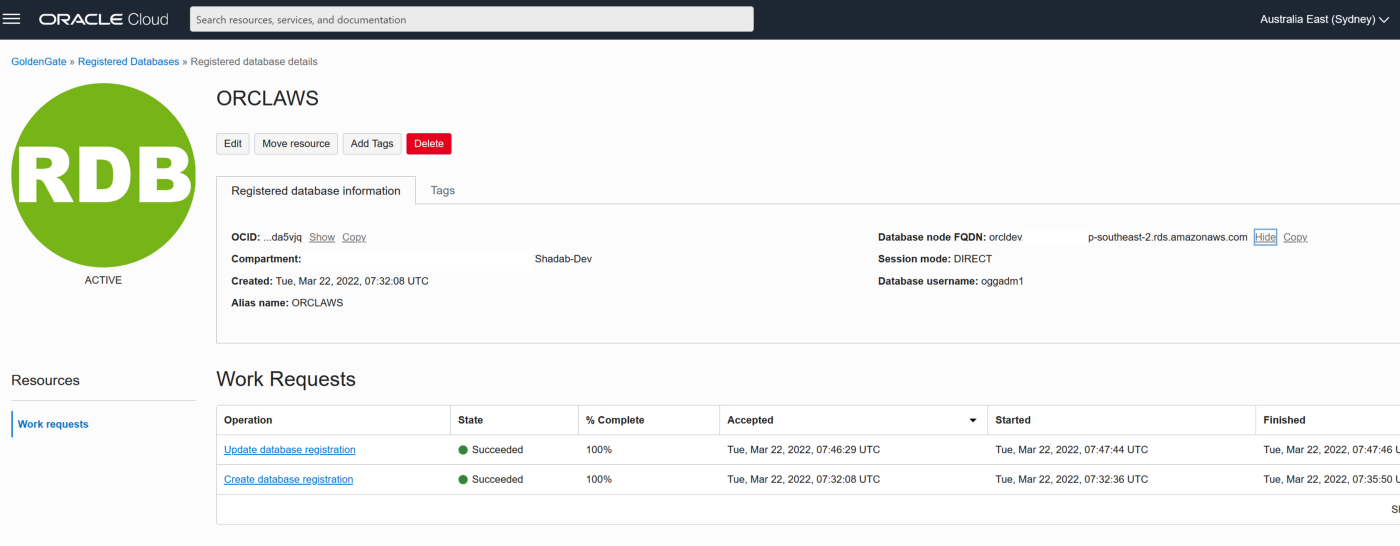
9. TNS entry for AWS RDS Instance
OGGTARGET=(DESCRIPTION=(ENABLE=BROKEN)(ADDRESS_LIST=(ADDRESS=(PROTOCOL=TCP)(HOST=orcl.*****.ap-southeast-2.rds.amazonaws.com)(PORT=1521)))(CONNECT_DATA=(SID=ORCL)))– To be added to Registered Database in OCI –(DESCRIPTION=(ENABLE=BROKEN)(ADDRESS_LIST=(ADDRESS=(PROTOCOL=TCP)(HOST=orcl.****.ap-southeast-2.rds.amazonaws.com)(PORT=1521)))(CONNECT_DATA=(SID=ORCL)))
Alias (to be used later in OCI GG configuration) : ORCLAWS
10. Create Test Table in RDS Oracle Instance
CREATE TABLE oggadm1.test (id number,name varchar2(100));
insert into oggadm1.test values (1,’Shadab’);
insert into oggadm1.test values (2,’Mohammad’);
commit;
11. Enable supplemental logging on with Admin user
Phase 4 — Create , Extract (Capture) and Replicat (Apply) and Start the Replication
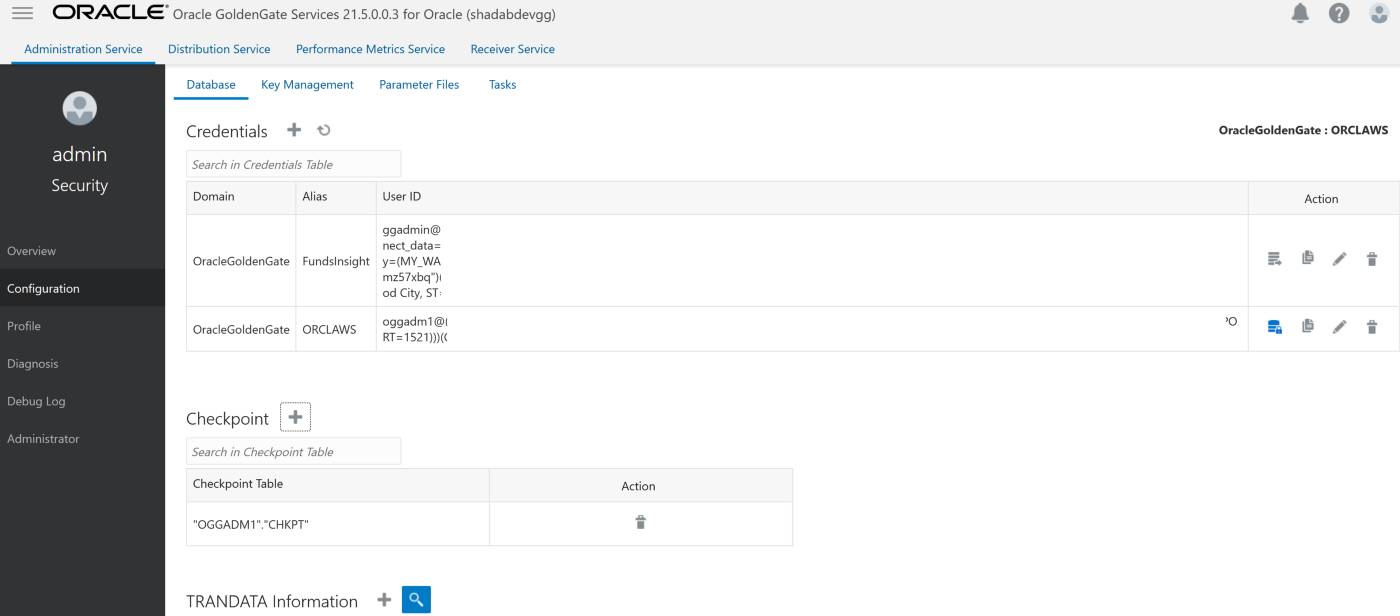
1. Create an Integrated Extract from Administration Service, click on the plus symbol next to the extract section
Go to Main Page > Configuration > Login to AWS RDS instance
a. Create Checkpoint table oggadm1.ckpt
b. Add Tran Data for Schema oggadm1
EXTRACT AWSEXT
USERIDALIAS ORCLAWS DOMAIN OracleGoldenGate
EXTTRAIL AW
TABLE OGGADM1.*;
2. Create Non-integrated replicat for ADB on trail file ‘aw’. click on the plus symbol next to the Replicat section
Go to Main Page > Configuration > Login to ATP instance
a. Create Checkpoint table admin.ckpt
b. Add Tran Data for Schema admin
c. Add heartbeat table
REPLICAT adbrep
USERIDALIAS FundsInsight DOMAIN OracleGoldenGate
MAP OGGADM1.TEST, TARGET ADMIN.TEST;
The status should be green on the OCI Goldengate Administration Dashboard
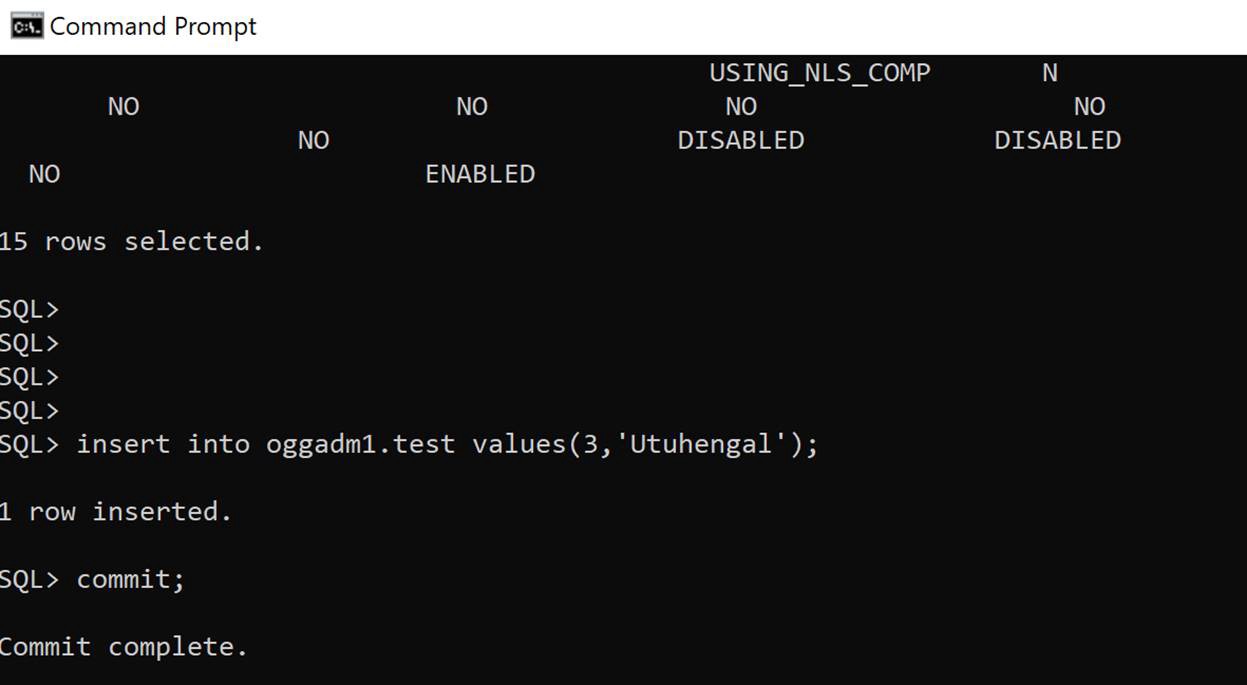
3. Insert transaction at RDS source
insert into oggadm1.test values(3,'Utuhengal');commit;
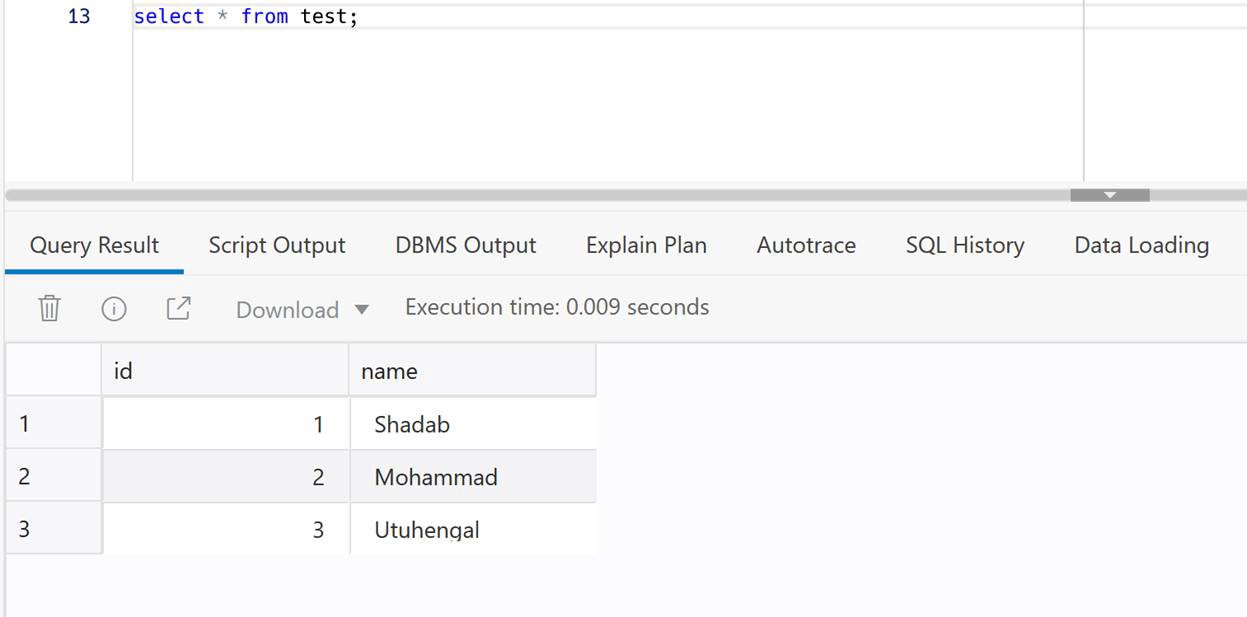
4. Check at ADB Target
select * from test;
Conclusion:
We have created cross-cloud replication from an Oracle Database sitting inside AWS to an Oracle Autonomous Database running on OCI. The idea was to demonstrate the capability and ease of Goldengate Microservices to run a a replication hub on OCI and let you create real-time change data capture across two different public clouds. Every component used in this architecture is a fully managed service without the need of managing any servers or installing any agents on either source or target as they are fully managed cloud services without access to under-lying host.
PostgreSQL is the most popular Open source database and there is a lot of information available when it comes to backing up and restoring PgSQL I have used these scripts to backup production databases and restored them to new Postgres Servers. So here it goes
Step 1: In Redshift Cluster Account 24xxxxxx16, do this
a) Go to IAM > Roles > Create Role b) Create Role > Redshift > Redshift – Customizable. c) No need to add policies or tags, go ahead and save this role as “RoleA” d) Add this role to your Redshift cluster. Goto Redshift Console > Select Cluster > Manage IAM > Add “RoleA” to Cluster
Step 2: In account which has the S3 Bucket Account 8xxxxxxxx11, do this:
a) Go to IAM > Policies > Create policy b) Select the JSON tab and add below IAM policy, replace my bucket name ‘shadmha-us-east-2’ with your bucket name
Chose Review Policy & Save the policy as let’s say ‘s3-cross-account-policy’
c) Go to Roles > Create Role > Select type of trusted entity as ‘Another AWS Account’ tab d) Enter Account ID of Redshift Cluster Account ‘24xxxxxx16’ > Permissions > Search policy created in a) “s3-cross-account-policy’ e) Go next > create role > save it as “RoleB” f) Go to Roles > Select “RoleB” > “Trust Relationships” tab > Edit trust telationships. Add the below policy:
Step 3: Go back to Account under which Redshift Cluster is created
a) Go to IAM > Roles > Select role which you created earlier “RoleA” b) Add inline policy to this role and add the below policy and save it
{ “Version”: “2012-10-17”, “Statement”: [ { “Sid”: “Stmt1487639602000”, “Effect”: “Allow”, “Action”: [ “sts:AssumeRole” ], “Resource”: “arn:aws:iam::80xxxxx11:role/RoleB” } ] } c) Create policy and Save it to role
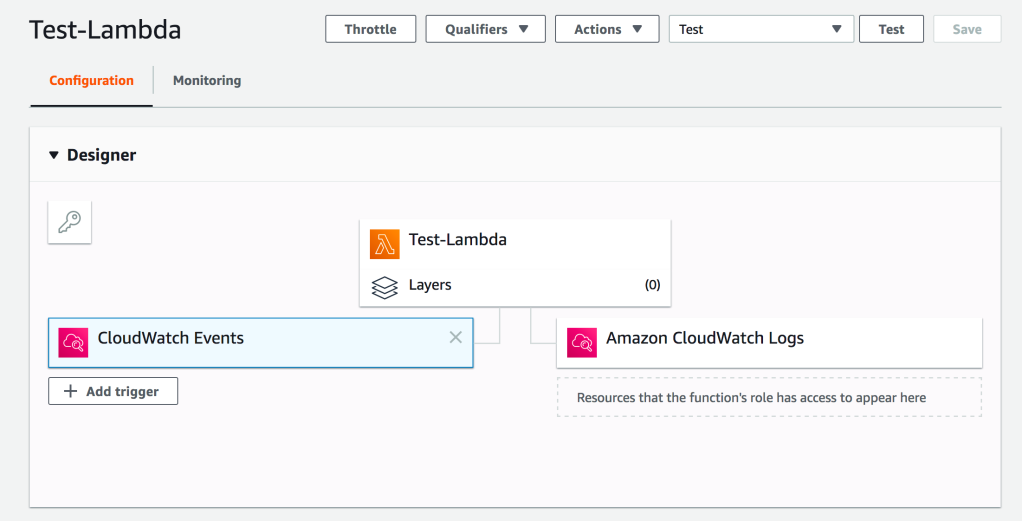
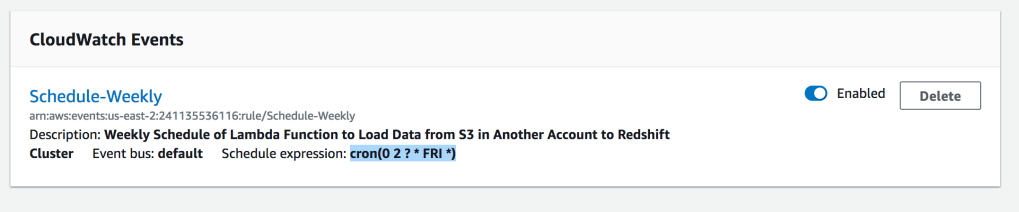
Part B: Deploy a Lambda Function Using Attached Code(S3-to-Redshift.zip). And Change Your Cluster and Bucket Details Accordingly
Add a Cloud Watch Event Trigger with Cron Expression : cron(0 2 ? * FRI *)
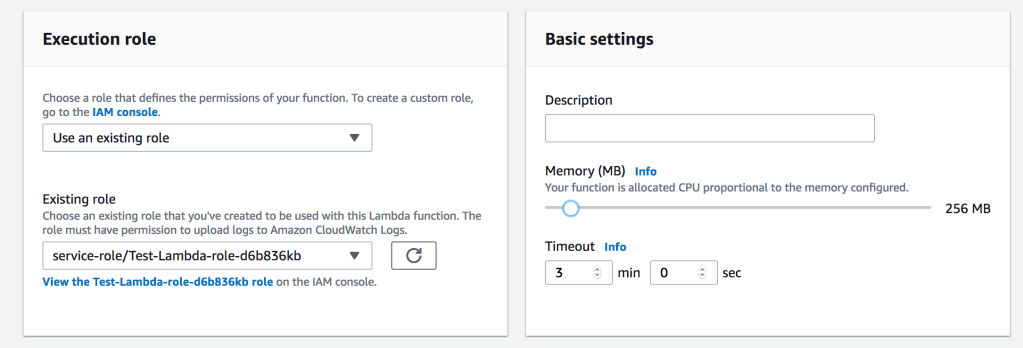
Increase Timeout & Memory of Lambda Function
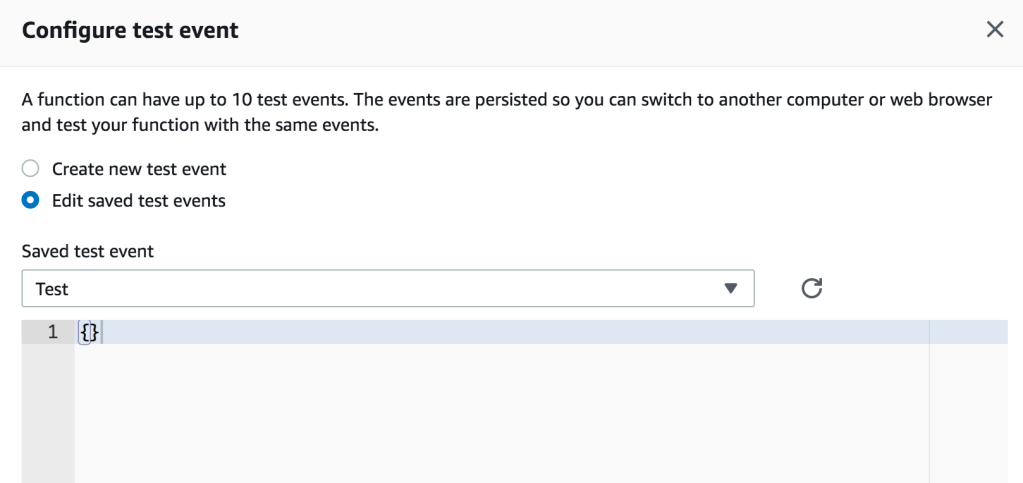
Configure Test Event
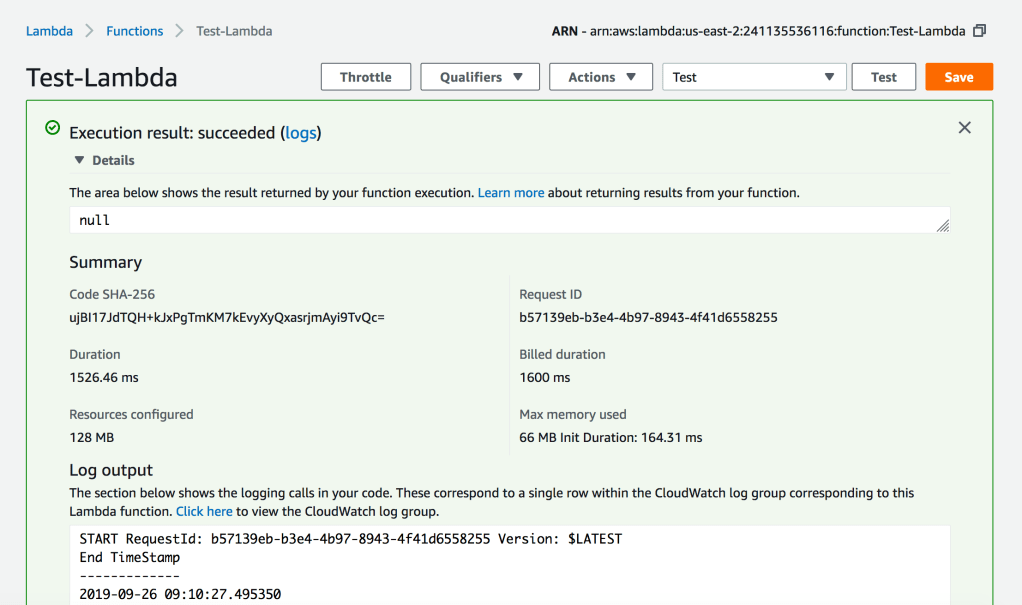
Execute the Lambda Function to Test
Python Code for Lambda Function
####################################################################################### # Author : Shadab Mohammad # Create Date : 13-05-2019 # Modified Date : 26-09-2019 # Name : Load Dataset from AWS S3 bucket to your Redshift Cluster # Dependencies : Requires Python 3.6+. Python Libraries required ‘psycopg2’ ####################################################################################### import psycopg2 import csv import time import sys import os import datetime from datetime import date datetime_object = datetime.datetime.now()
print (“###### Load Data From S3 to Redshift ######”) print (“”) print (“Start TimeStamp”) print (“—————“) print(datetime_object) print (“”)
def lambda_handler(event, context): #Obtaining the connection to RedShift con=psycopg2.connect(dbname= ‘testdb’, host=’shadmha-us-east-2.crhzd8dtwytq.us-east-2.redshift.amazonaws.com’, port= ‘5439’, user= ‘awsuser’, password= ‘SomeP@ssword’)
-- Query Performance Review --

$ psql -h redshift-private-2a.c2nh0wlf4z7g.ap-southeast-2.redshift.amazonaws.com -p 5439 -U awsuser -f review_query_pf.sql testdb

$ vim review_query_pf.sql


\o redshiftxxx.txt
\set vpattern 1678
\qecho -- Query Text - stl_explain
select * from stl_querytext where query = :vpattern;
\qecho -- Explain plan - stl_explain
select userid,query,nodeid,parentid,trim(plannode) plannode,trim(info) info from stl_explain where query = :vpattern;
\qecho --Review WLM Queuing for above queries - stl_wlm_query
SELECT TRIM(DATABASE) AS DB,
       w.query,
       SUBSTRING(q.querytxt,1,100) AS querytxt,
       w.queue_start_time,
       w.service_class AS class,
       w.slot_count AS slots,
       w.total_queue_time / 1000000 AS queue_seconds,
       w.total_exec_time / 1000000 exec_seconds,
       (w.total_queue_time + w.total_exec_time) / 1000000 AS total_seconds
FROM stl_wlm_query w
  LEFT JOIN stl_query q
         ON q.query = w.query
        AND q.userid = w.userid
WHERE w.query = :vpattern
--AND w.total_queue_time > 0
ORDER BY w.total_queue_time DESC,
         w.queue_start_time DESC;
\qecho --Get information about commit stats - stl_commit_stats
select startqueue,node, datediff(ms,startqueue,startwork) as queue_time, datediff(ms, startwork, endtime) as commit_time, queuelen
from stl_commit_stats
where xid in (select xid from stl_querytext where query = :vpattern)
order by queuelen desc , queue_time desc;
\qecho --Compile Time
select userid, xid,  pid, query, segment, locus,
datediff(ms, starttime, endtime) as duration, compile
from svl_compile
where query = :vpattern;
--\qecho --Understand other operations within the same PID - svl_statementtext
--select userid,xid,pid,label,starttime,endtime,sequence,type,trim(text) from svl_statementtext where pid in (select pid from stl_querytext where query = :vpattern);
\qecho --Review query work - STL_PLAN_INFO
select * from STL_PLAN_INFO where query = :vpattern;
\qecho --Review query work - svl_query_report
select * from svl_query_report where query = :vpattern order by segment,step,slice;
\qecho --Review query work - svl_query_summary
select * from svl_query_summary where query = :vpattern order by seg,step;
\qecho -- Review alert
select * from stl_alert_event_log where query = :vpattern;
\qecho -- Review STL_ERROR
select userid,process,recordtime,pid,errcode,trim(file),linenum,trim(context),trim(error) from stl_error where recordtime between (select starttime from stl_query where query = :vpattern) and (select endtime from stl_query where query = :vpattern);
\q
Create DMS Replication From MongoDB 4.2 on EC2 Linux to Redshift
Summary
We will create a hub to spoke replication from Mongo DB 4.2 Database to Redshift Schema. MongoDb is installed in the same VPC as Redshift and DMS replication Instance
Main Text
MongoDB is a NoSQL Datastore where data in inserted and read in JSON format. Internally, a MongoDB document is stored as a binary JSON (BSON) file in a compressed format. Terminology for database, schema and tables in MongoDB is a bit different when compared to relational databases. Here’s how each jargon in MongoDb compares to one in Redshift/PostgreSQL
MongoDB
Redshift/PostgreSQL
Database
Schema
Collection
Table
Documents
Records/Rows
MongoDB does not have a a proper structure for a schema and it is is essentially a document store so data can be inserted without defining a proper schema or a structure. This gives MongoDB a lot of flexibility and hence it is the preferred choice for modern applications as you can start development of your application without defining a data model first. It is a schema-less approach to software architecture, which has its own pros and cons.
In our example we will work through the default database in MongoDB called “admin” and create collections(tables) in it and those tables will be replicated to an equivalent schema in Redshift called “admin” which will hold the different tables. We will go about this in 3 stages:
Stage 1 : Create MongoDB on EC2 AMZN Linux, create the collections and connect to MongoDB from your client machine and check the configuration.
Stage 2: Create Redshift Cluster, Aurora PostgreSQL in Private and Public Subnet and Connect to the All Database instances and check.
Stage 3: Create DMS Replication Instance, DMS Replication Endpoints & DMS Replication Tasks.And finally we will check if all data is being replicated by DMS to all the targets.
Architecture : It is a Hub-to-Spoke Architecture with MongoDB Source Being Replicated to Multiple Heterogeneous Targets. However in this Article we will only configure Replication from MongoDB to Redshift.
Stage 1: Create a EC2 Amazon Linux in a Public Subnet and Install MongoDB in it
You can use AWS ‘MongoDB Quick Start’ guide on AWS to deploy MongoDB into a new VPC or deploy into an existing VPC. The guide has two cloud formation templates which can create a new VPC under your account, configure the public & private subnets and launch the EC2 instances with latest version of MongoDB installed. Check this link for the quick deployment options for MongoDB on AWS : https://docs.aws.amazon.com/quickstart/latest/mongodb/step2.html
OR
If you want to install MongoDB manually then you can follow the below procedure :
4. Modify mongod configuration file /etc/mongod.conf using vi editor
Change below lines from
# network interfaces net: port: 27017 bindIp: 127.0.0.1 # Listen to local interface only, comment to listen on all interfaces. #security:
To
# network interfaces net: port: 27017 bindIp: 0.0.0.0 # Listen to local interface only, comment to listen on all interfaces. security: authorization: enabled
5. Restart mongod service
$ sudo service mongod restart
Use admin DB as authentication database and ‘root’ user can be used for CDC full load task.
6. For CDC replication, a rmongodb replica needs to be setup and permissions need to be modified/added as below :
Modify mongod.conf using vi editor
$ sudo vi /etc/mongod.conf
replication: replSetName: rs0
$ sudo service mongod restart
7. Initiate Replica Set for CDC
$ mongo localhost/admin -u root -p
> rs.status()
{ “ok” : 0, “errmsg” : “no replset config has been received”, “code” : 94, “codeName” : “NotYetInitialized” }
> rs.initiate()
{ “info2” : “no configuration specified. Using a default configuration for the set”, “me” : “ip-10-0-137-99.ap-southeast-2.compute.internal:27017”, “ok” : 1 }
8. Make sure security group is open for dms replication group for the port on your EC2 instance where MongoDB is running (Default MongoDB port is 27017)
9. Add a collection (table) with some data to database ‘admin’ in the mongodb installation
We have created 3 user collections called ‘accounts’,’inventory’ & ‘inventory_new’. These 3 collections(tables) shall be replicated to our targets. Connect and Check from MongoDB Compass on your Client Machine
Stage 2: Install Redshift Cluster
Create a VPC with Public and Private Subnets. In a real world production scenario, it is always recommended to put your databases in a Private subnet
In MongoDB as source you have 2 modes available : Document Mode and Table Mode. Some important points to note in this regard are :
A record in MongoDB is a document, which is a data structure composed of field and value pairs. The value of a field can include other documents, arrays, and arrays of documents. A document is roughly equivalent to a row in a relational database table.
A collection in MongoDB is a group of documents, and is roughly equivalent to a relational database table.
Internally, a MongoDB document is stored as a binary JSON (BSON) file in a compressed format that includes a type for each field in the document. Each document has a unique ID.
MongoDB is officially supported on versions 2.6.x and 3.x as a database source only. But I have tested it with MongoDB 4.2, which is the latest community version and it works without any issues, However I would advise to stick with the officially certified versions. AWS DMS supports two migration modes when using MongoDB as a source. You specify the migration mode using the Metadata mode parameter using the AWS Management Console or the extra connection attribute nestingLevel when you create the MongoDB endpoint.
Document mode
In document mode, the MongoDB document is migrated as is, meaning that the document data is consolidated into a single column named _doc in a target table.
Table mode
In table mode, AWS DMS transforms each top-level field in a MongoDB document into a column in the target table. If a field is nested, AWS DMS flattens the nested values into a single column. AWS DMS then adds a key field and data types to the target table’s column set.
Connection Attributes
nestingLevel
Value : NONE
ONE
Description : NONE – Specify NONE to use document mode. Specify ONE to use table mode.
extractDocID
Value :true
false
Description : false – Use this attribute when nestingLevel is set to NONE.
Test the Endpoint
b) Create Redshift Replication Endpoint
Test Redshift Endpoint
Once you create the endpoint for Redshift it will automatically adds a DMS endpoint roles and assigns it to the Redshift role. Further down when we create S3 as target endpoint we need to add the S3 permissions via a managed policy to this same role
c) Create MongoDB-Redshift Database Migration Task
Go to DMS Console > Conversion & Migration > Database Migrations Tasks > Create Task
Before moving ahead step that the security group of Redshift allows ingress rules for port 5439 for 0.0.0.0/0 or preferably the Security Group ID of your Replication Instance is added to the ingress rules for Redshift SG over port 5439. Check this link for more information : https://docs.aws.amazon.com/dms/latest/userguide/CHAP_Target.Redshift.html
In our case DMS Replication Instance SGID is ‘sg-0a695ef98b6e39963’. So SG of Redshift looks like below:
Checking from Redshift..we can see all the 3 tables from mongodb ‘accounts’,’inventory’ & ‘inventory_new’ are created and also the schema ‘admin’ is automatically created by DMS.
Query all the tables to confirm data is replicated
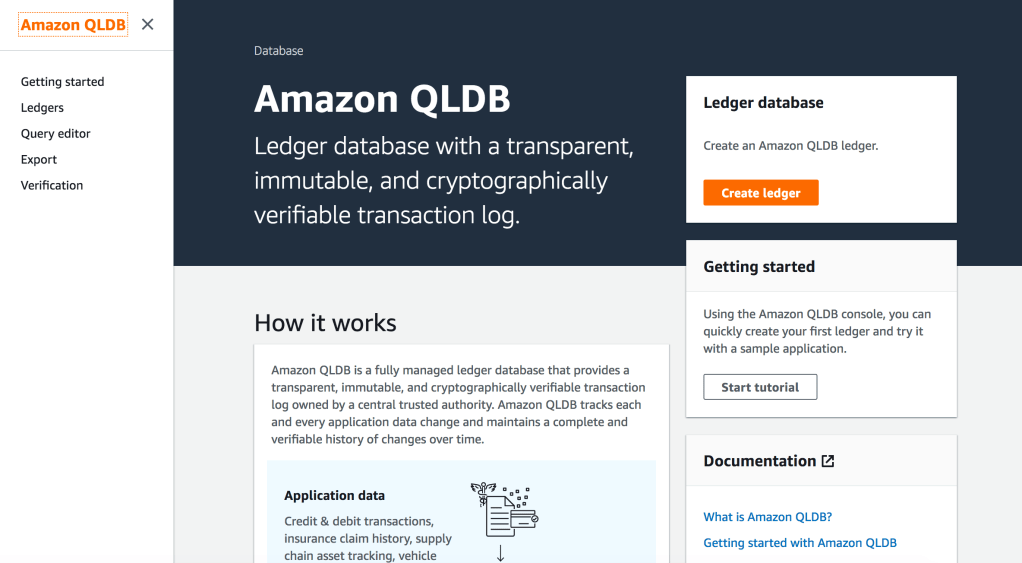
Amazon QLDB is a new specialist database technology which uses the concept of blockchain for database which maintains a history of every transaction using an immutable & cryptographically verifiable block hash for each record. QLDB uses an immutable transactional log, known as a journal, for data storage. The journal tracks every change to your data and maintains a complete and verifiable history of changes over time.
Sourcing data from the journal, QLDB uses a cryptographic hash function (SHA-256) with a Merkle tree–based model to generate a secure output file of your ledger’s full hash chain. This output file is known as a digest and acts as a fingerprint of your data’s entire change history as of a point in time. It enables you to look back and validate the integrity of your data revisions relative to that fingerprint.
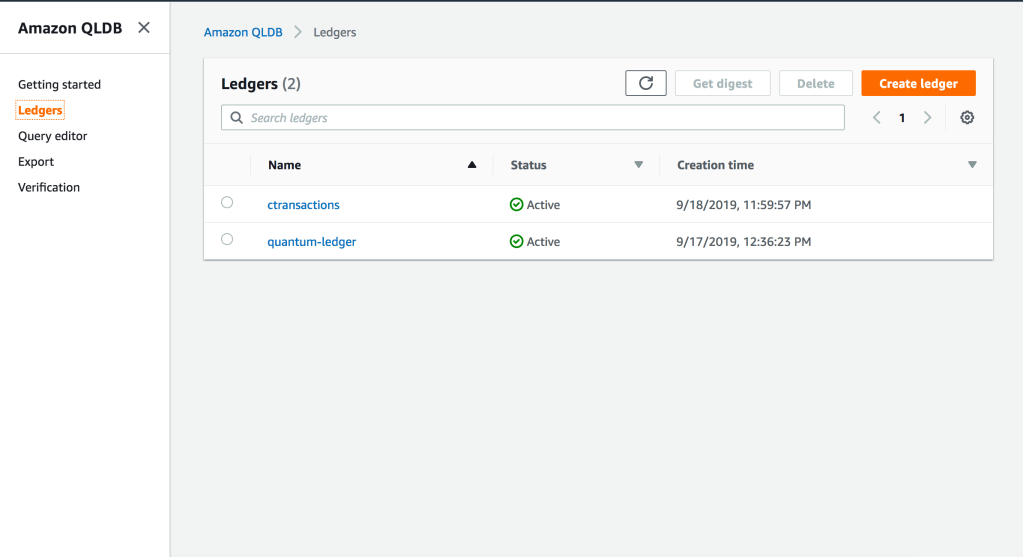
Each ledge in QLDB has exactly one journal. A journal can have multiple strands, which are partitions of the journal.
QLDB is not a de-centralized blockchain network like Bitcoin or Ethereum, if you are looking for a managed block chain network then this is what you must be after –> Amazon Managed Blockchain
/* QLDB is now Generally Available in many regions. Ensure you update your awscli to the latest version to have access to QLDB from awscli. */
5. Create more records and change the first record from ‘Current’ to ‘Saving’ account
Important : Because QLDB does not enforce schema, you can insert the same document into a table multiple times. Each insert statement commits a separate document entry to the journal, and QLDB assigns each document a unique ID.
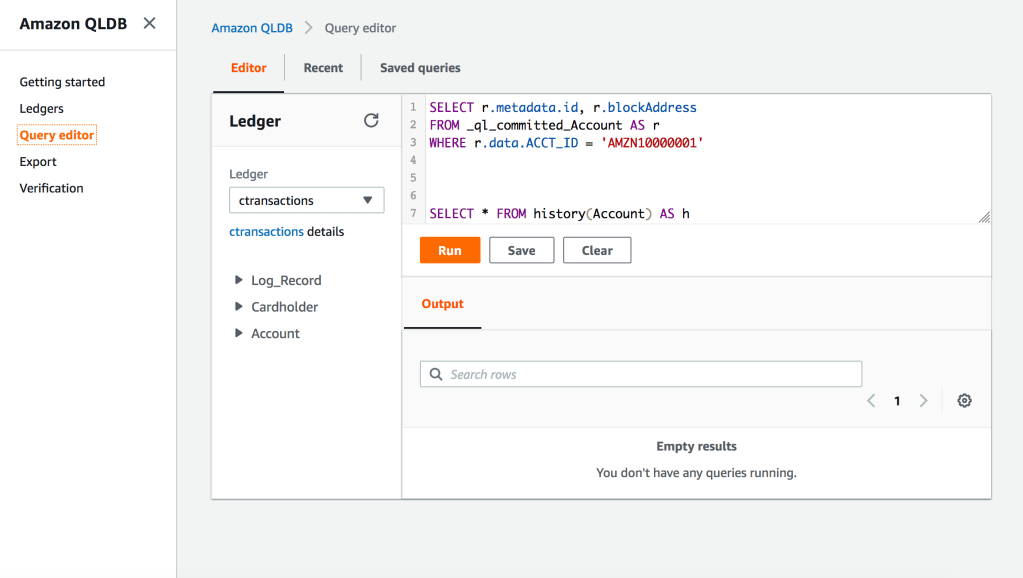
6. Now let us check for all the changes done to this account using below query. We can check for all modifications made to the Account ID. Each modification or inser generated a unique hash we can be traced back to what that modification was
SELECT
    ACCT_ID FROM Account AS a BY ACCT_ID WHERE a.ACCT_ID = 'AMZN10000001'
Using the first hash we can see the account type was “Current”, and after we modified the document and checked it with the 2nd hash it now shows “Saving”. And we have a history of all modifications applied to that account to traverse back and check all modifications made to that Account ID.
8. To Verify a Document Revision
SELECT r.metadata.id, r.blockAddress FROM _ql_committed_Account AS r WHERE r.data.ACCT_ID = 'AMZN10000001'
id blockAddress “7oOLmXPyHjXBSBCio76rJo” {strandId:”KQrxUDo7jDX4scpbKkhEVZ”,sequenceNo:95}
This is just the beginning of what can be possible to create in the FinTech world. No more complex audit reports and expensive 3rd part tools which are an additional overhead to manage, but your database itself keeps a history of any changes made to a transaction or account or debit/credit card.
This document addresses the specific configuration points that needs to be in place in order to build and store a Hive mestastore outside an EMR cluster in a RDS MySQL database. It also covers the steps to connect a Redshift cluster to an EMR cluster so Redshift can create and access the tables stored within the external metastore.
Resources Used:
• Redshift Cluster
• RDS MySQL Instance
• EMR Cluster
Note: All resources must be in same VPC and same region for this practice.
Creating the RDS MySQL:
1 – First, start creating a RDS MySQL instance if you don’t have one already. Open AWS RDS Console and create an MySQL instance that will be used during this practice.
Note: Please make note of RDS security group, endpoint, Master User and Master Password. We will need that information later on.
2 – Once the RDS MySQL instance is created, modify its security groups to add a rule for All traffic on all Port Range to be allowed from the VPC’s default security group.
Note: This VPC’s default Security Group will be used while creating the EMR cluster later on as well but it needs to be whitelisted beforehand otherwise the EMR launching will fail while trying to reach out to the RDS MySQL.
Before creating the EMR Cluster:
3 – After creating the RDS MySQL (and open its security group to EMR) but right before creating the EMR cluster, a JSON configuration file needs to be created. This file will be ingested by EMR during the bootstrapping phase of EMR’s creation, it will basically tell EMR how to access the remote RDS MySQL database.
5 – Paste it in a text editor and modify it carefully with the RDS details you noted earlier.
Note: Be careful, the value property can not contain any spaces or carriage returns. It should appear all on one line. Save it as “hiveConfiguration.json”.
6 – The final JSON configuration file should look like the following:
Note 1: replace <hostname>, <username>, <password> with your own details:
Note 2: The part “hive?createDatabaseIfNotExist=true” determines the name of the database to be created in the MySQL RDS, in this case the database will be called “hive”.
7 – After creating above file, upload it to an S3 bucket/folder of your choice (in the same region of your resources).
Creating the EMR:
8 – Now, it is time to create the EMR cluster. To do this, open AWS EMR console and click Create Cluster button. This will prompt the Quick Options page but we won’t be using that. Click on Go to advanced options on the top of the page.
9 – This will send you to the Advanced Options page. There, under Software Configuration, select the following Applications:
Hadoop, Ganglia, Hive, Hue, Tez, Pig, Mahout
10 – In the same page, under Edit Software Settings section, click Load JSON from S3 and select the S3 bucket/path where you uploaded the previous created file “hiveConfiguration.json“. Select the file there and hit Select.
11 – In the Hardware Configuration page, make sure that the EMR cluster is in the same VPC as your MySQL RDS instance. Hit Next if you don’t want to change any Network configuration or Node types.
12 – Hit Next in the General Options page if you don’t want to change anything, although you might want to change the name of your EMR cluster here.
13 – In the next page, Security Options, make sure you have an EC2 Key Pair in that region and select it. Otherwise, create one!
Note: Create one now (if you don’t have one) before creating the EMR as you CAN’T add it later!!!
14 – Still in the Security Options page, expand the EC2 security groups panel and change both, Master and Core & Task instances to use the VPC’s default security group (the same whitelisted in the RDS MySQL security group earlier).
15 – Hit Create cluster and wait the EMR to be created. It will take some time…
Confirming that the metastore was created in the RDS MySQL
16 – Once the EMR is created, another rule needs to be added to the VPC’s default security group, one that allows SSHing into the EMR cluster on port 22 from your local IP. It should look like the following:
17 – With the right rules in place, try to connect to your EMR cluster from your local machine:
18 – EMR has a MySQL client installed, use this client to connect to your MySQL database and perform few tests such as if the Security Groups are working properly and if the “hive” database was created properly
Note: You can do a telnet test from within EMR box as well to test Security Group access.
19 – To connect to the RDS MySQL, run the following command from your EMR box:
Example: mysql -h database-1.cefjr3enh3dk.us-east-2.rds.amazonaws.com -P 3306 -u admin123 -pPwD12345
20 – Once connected, use the following commands to verify if the Hive metastore was indeed created in the RDS. You should be able to see a database named “hive” there:
show databases; à Lists all databases – “hive” should be there use hive; à Connects you to “hive” database show tables; à Lists all the meta tables within hive database select * from TBLS; à Lists all tables created in hive. At this point there’s none
Setting up necessary Spectrum Roles and Network requirements for Redshift and EMR
Note 1: Following steps assume that you already have a Redshift cluster and that you can connect to it. It will not guide you on how to create and access the Redshift cluster.
Note 2: Since EMR, RDS MySQL share the same VPC’s default security group, they should be able to communicate to each other already. If that’s the case, you can skip Step 22 and go straight to Step 23, otherwise, If EMR and Redshift use different security groups, please do the step 22 first.
21 – Create a Role for Spectrum and attach it to your Redshift cluster. Follow the instructions here:
Note: In summary, this creates an EC2 security group with Redshift’s Security Group and the EMR’s master node’s security groups inside it. Redshift’s Security Group must allow TCP in every port (0 – 65535) while EMR’s Security Group must allow TCP in port 9083 (Hive’s default). Next, you attach this newly created security group to both of your Redshift and EMR clusters.
23 – Once this is done, you should now be able to create the External Schema in Redshift, query the external tables from Redshift and also be able to create/see the schemas/tables from EMR Hive as well. However, at this point there’s no tables created yet.
Creating Tables on Hive First
24 – Log to Hive console and run the following:
> show databases; default (that’s the only database so far)
> create external table hive_table (col1 int, col2 string) ROW FORMAT DELIMITED FIELDS TERMINATED BY ‘|’ location ‘s3://<your_bucket>/<your_folder>/‘;
> show tables; hive_table (that’s the table we just created)
25 – Log back to your MySQL database and run the following commands:
show databases; à Lists all databases – “hive” should be there use hive; à Connects you to “hive” database show tables; à Lists all the meta tables within hive database select * from TBLS; à Lists all tables created in hive, “hive_table” is there!
Note: Now you will be able to see the newly created table “hive_table” showing on your External MySQL catalog.
Creating Schemas and Tables on Redshift Now
26 – On Redshift side, an External Schema must be created first before creating or querying the Hive tables, like following:
CREATE EXTERNAL SCHEMA emr_play à It can be any name, that’s a schema valid only for Redshift. FROM HIVE METASTORE DATABASE ‘default’ à Use default database to match the database we have in Hive. URI ‘172.XXX.XXX.XXX‘ PORT 9083 à EMR’s Private IP of the Master Instance. Hive’s default port is 9083. IAM_ROLE ‘arn:aws:iam::000000000000:role/spectrum‘; à A valid Spectrum Role attached Redshift.
27 – Create the table(s):
create external table emr_play.redshift_table (col1 int, col2 varchar) ROW FORMAT DELIMITED FIELDS TERMINATED BY ‘|’ location ‘s3://<your_bucket>/<your_folder>/‘;
28 – Simply query the table now:
select * from emr_play.redshift_table;
29 – One more time, log back to your MySQL database and run the following commands again:
show databases; à Lists all databases – “hive” should be there use hive; à Connects you to “hive” database show tables; à Lists all the meta tables within hive database select * from TBLS; à Lists all tables created in hive, both tables are there!
Note: You should be able to see the both Hive and Redshift tables now showing on your External MySQL catalog. You can also query the tables and create new tables on both Hive and Redshift side.
version: “3” Oracle Database Docker Image for ‘xe’ version 18.4.0 is ready to be extended:
--> oracle/database:18.4.0-xe
Build completed in 752 seconds.
You will now have a docker image named oracle/database:18.4.0-xe which you can deploy to Docker as a container. The Oracle 18c XE image can be up-to 10GB so ensure you have the requisite space.
Create a docker-compose.yml file and deploy the container
Creating network “dockerfiles_default” with the default driver Creating dockerfiles_oracle_1 … done Attaching to dockerfiles_oracle_1 … oracle_1 | Use https://localhost:5500/em to access Oracle Enterprise Manager for Oracle Database XE oracle_1 | The Oracle base remains unchanged with value /opt/oracle oracle_1 | ######################### oracle_1 | DATABASE IS READY TO USE! oracle_1 | ######################### oracle_1 | The following output is now a tail of the alert.log: oracle_1 | Pluggable database XEPDB1 opened read write oracle_1 | Completed: alter pluggable database XEPDB1 open
The process can take up-to 15-20 mins for the container to start
Connect using SQL Developer to your Oracle Xe Docker DB
Username : sys Password : testing12345 Role : SYSDBA
Hostname : localhost Port : 11521 Service Name : XE
== Connect to the Pluggable DB part of Oracle XE ==
Username : sys Password : testing12345 Role : SYSDBA
Hostname : localhost Port : 11521 Service Name : XEPDB1
Creating network “oracle_ee_18c_default” with the default driver Creating oracle_ee_18c_oracle_1 … done Attaching to oracle_ee_18c_oracle_1 oracle_1 | ORACLE PASSWORD FOR SYS, SYSTEM AND PDBADMIN: testing12345 …
Database creation complete. For details check the logfiles at: oracle_1 | /opt/oracle/cfgtoollogs/dbca/ORCLCDB. oracle_1 | Database Information: oracle_1 | Global Database Name:ORCLCDB oracle_1 | System Identifier(SID):ORCLCDB racle_1 | ######################### oracle_1 | DATABASE IS READY TO USE! oracle_1 | ######################### oracle_1 | The following output is now a tail of the alert.log: oracle_1 | ORCLPDB1(3):CREATE SMALLFILE TABLESPACE “USERS” LOGGING DATAFILE ‘/opt/oracle/oradata/ORCLCDB/ORCLPDB1/users01.dbf’ SIZE 5M REUSE AUTOEXTEND ON NEXT 1280K MAXSIZE UNLIMITED EXTENT MANAGEMENT LOCAL SEGMENT SPACE MANAGEMENT AUTO oracle_1 | ORCLPDB1(3):Completed: CREATE SMALLFILE TABLESPACE “USERS” LOGGING DATAFILE ‘/opt/oracle/oradata/ORCLCDB/ORCLPDB1/users01.dbf’ SIZE 5M REUSE AUTOEXTEND ON NEXT 1280K MAXSIZE UNLIMITED EXTENT MANAGEMENT LOCAL SEGMENT SPACE MANAGEMENT AUTO oracle_1 | ORCLPDB1(3):ALTER DATABASE DEFAULT TABLESPACE “USERS” oracle_1 | ORCLPDB1(3):Completed: ALTER DATABASE DEFAULT TABLESPACE “USERS” oracle_1 | 2020-02-16T04:47:06.581223+00:00 oracle_1 | ALTER SYSTEM SET control_files=’/opt/oracle/oradata/ORCLCDB/control01.ctl’ SCOPE=SPFILE; oracle_1 | 2020-02-16T04:47:06.789543+00:00 oracle_1 | ALTER SYSTEM SET local_listener=” SCOPE=BOTH; oracle_1 | ALTER PLUGGABLE DATABASE ORCLPDB1 SAVE STATE oracle_1 | Completed: ALTER PLUGGABLE DATABASE ORCLPDB1 SAVE STATE
Connect with SQL Developer
Username : sys Password : testing12345 Role : SYSDBA
Hostname : localhost Port : 11522 Service Name : ORCLCDB
== Connect to the Pluggable DB part of Oracle 18c EE ==
Username : sys Password : testing12345 Role : SYSDBA
Hostname : localhost Port : 11522 Service Name : ORCLPDB1