Introduction: Change Data Capture (CDC) is a technique used to track changes in a database, such as inserts, updates, and deletes. In this blog post, we will show you how to implement a custom CDC in PostgreSQL to track changes in your database. By using a custom CDC, you can keep a record of changes in your database and use that information in your applications, such as to provide a history of changes, track auditing information, or trigger updates in other systems
Implementing a Custom CDC in PostgreSQL: To implement a custom CDC in PostgreSQL, you will need to create a new table to store the change information, create a trigger function that will be executed whenever a change is made in the target table, and create a trigger that will call the trigger function. The trigger function will insert a new row into the change table with the relevant information, such as the old and new values of the record, the time of the change, and any other relevant information.
To demonstrate this, we will show you an example of a custom CDC for a table called “employee”. The change table will be called “employee_cdc” and will contain columns for the timestamp, employee ID, old values, and new values of the employee record. The trigger function will be executed after an update on the “employee” table and will insert a new row into the “employee_cdc” table with the relevant information. Finally, we will show you how to query the “employee_cdc” table to retrieve a list of all changes that have occurred in the “employee” table since a certain timestamp.
Create the Employee and CDC table
To store the CDC information, you need to create a new table in your PostgreSQL database. In this example, we will create a table called “employee”, “employee_cdc”, “employee_audit” with the following columns:
CREATE TABLE employee (
id SERIAL PRIMARY KEY,
name VARCHAR(100) NOT NULL,
department VARCHAR(50) NOT NULL,
salary NUMERIC(10,2) NOT NULL,
hire_date DATE NOT NULL
);
In this table, “id” is an auto-incremented primary key, “timestamp” is a timestamp with time zone to store the time of the change, “employee_id” is the primary key of the employee record that was changed, and “old_values” and “new_values” are text columns to store the old and new values of the employee record, respectively.
To capture the changes in the employee table, you will need to create a trigger function that will be executed whenever a record is inserted, updated, or deleted in the table. The trigger function will insert a new row into the “employee_cdc” table with the relevant information. Here is an example trigger function:
CREATE OR REPLACE FUNCTION employee_cdc() RETURNS TRIGGER AS $$
BEGIN
IF (TG_OP = 'UPDATE') THEN
INSERT INTO employee_cdc (timestamp, employee_id, old_values, new_values)
VALUES (now(), NEW.id, row_to_json(OLD), row_to_json(NEW));
INSERT INTO employee_audit (employee_id, old_values, new_values)
VALUES (NEW.id, row_to_json(OLD), row_to_json(NEW));
END IF;
RETURN NULL;
END;
$$ LANGUAGE plpgsql;
This trigger function uses the “row_to_json” function to convert the old and new values of the employee record into JSON strings, which are then stored in the “old_values” and “new_values” columns of the “employee_cdc” table. The “NOW()” function is used to get the current timestamp.
4. Create the trigger
Now that the trigger function has been created, you need to create the trigger on the “employee” table that will call the function whenever a record is updated. You can create the trigger with the following command:
CREATE TRIGGER employee_cdc_trigger
AFTER UPDATE ON employee
FOR EACH ROW
EXECUTE FUNCTION employee_cdc();
4. Query the CDC table
In your application code, you can query the “employee_cdc” table to get a list of all changes that have occurred since a certain timestamp. For example, to get all changes since January 1st, 2023, you can use the following SQL query:
SELECT * FROM employee_cdc
WHERE timestamp >= '2023-01-01 00:00:00';
You can then process these changes as needed in your application code.
Conclusion: In this blog post, we have shown you how to implement a custom Change Data Capture (CDC) in PostgreSQL to track changes in your database. By using a custom CDC, you can keep a record of changes in your database and use that information in your applications. Whether you are tracking changes for auditing purposes, providing a history of changes, or triggering updates in other systems, a custom CDC is a useful tool to have in your PostgreSQL toolkit.
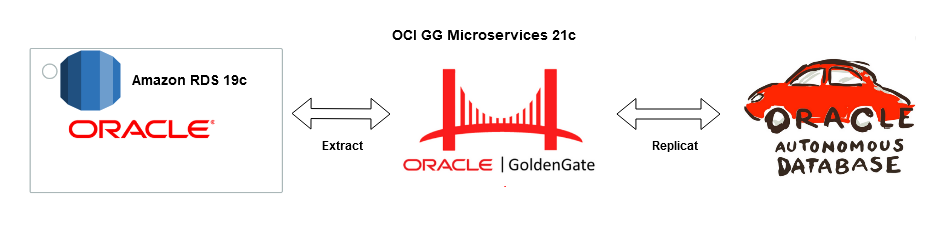
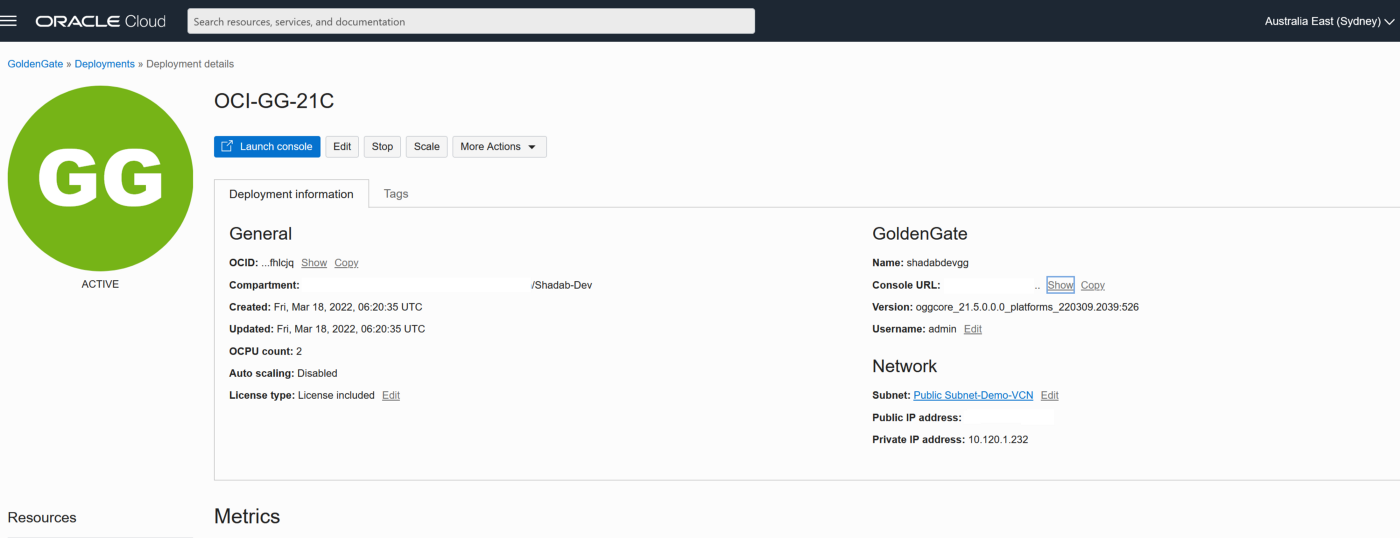
Goldengate Microservices 21c is the latest version of the microservices architecture which makes creating data mesh and data fabric across different public clouds as easy as a few clicks. Goldengate is available on OCI as a fully managed service with auto-scaling. It does not.require installation of Goldengate software at either the source or Target db instances. Goldengate uses a capture and apply mechanism for replication using trail files. Both the extract (capture) and replicat (apply) processes run on the Goldengate replication instance which acts as a hub.
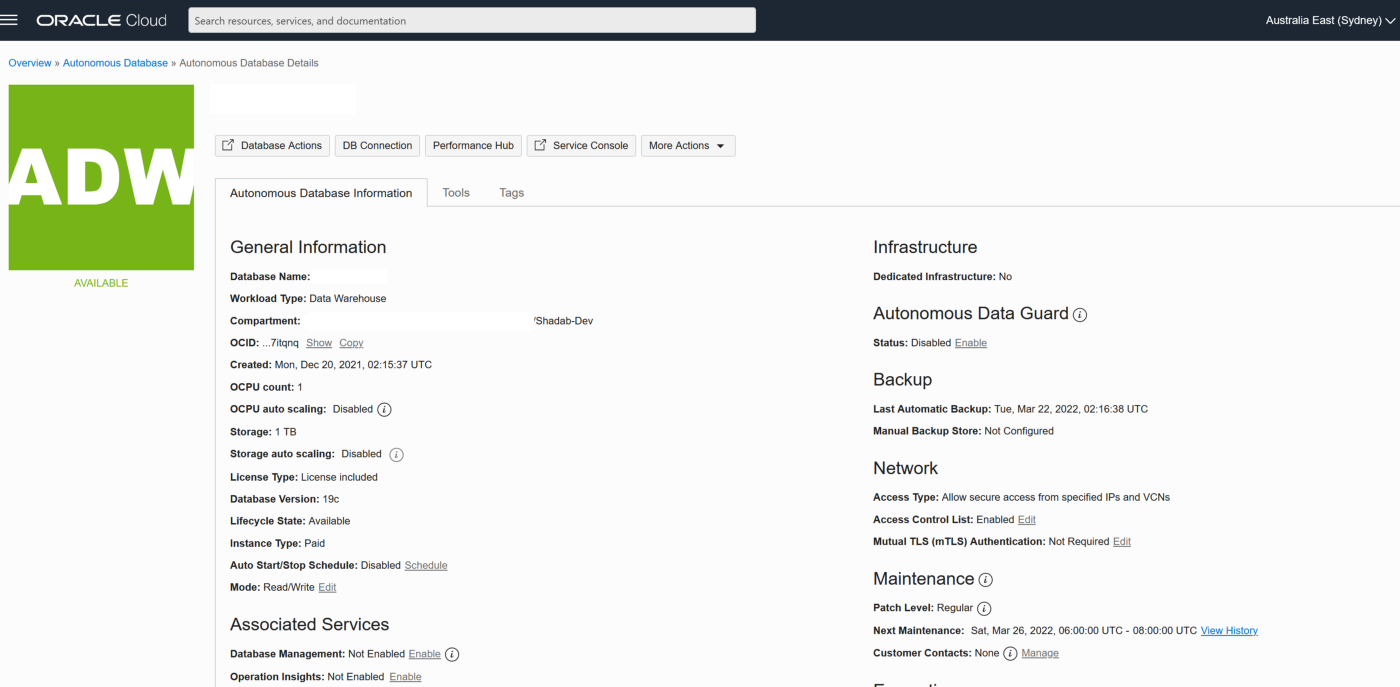
Let us go ahead and create a data pipeline for replicating Data in real-time using Oracle Cloud Infrastructure (OCI) Goldengate 21c from Amazon RDS Oracle Instance to an Oracle Autonomous database in OCI. Below are some of the common use cases for this solution :
Use Cases
Cross-cloud replication of Oracle Database from AWS RDS to OCI
Migration of Oracle Database with Zero Downtime from AWS RDS to OCI
Creating Multi-Cloud Microservices Application with Oracle database as the persistent data store
Creating a Multi-cloud Data Mesh for Oracle Database
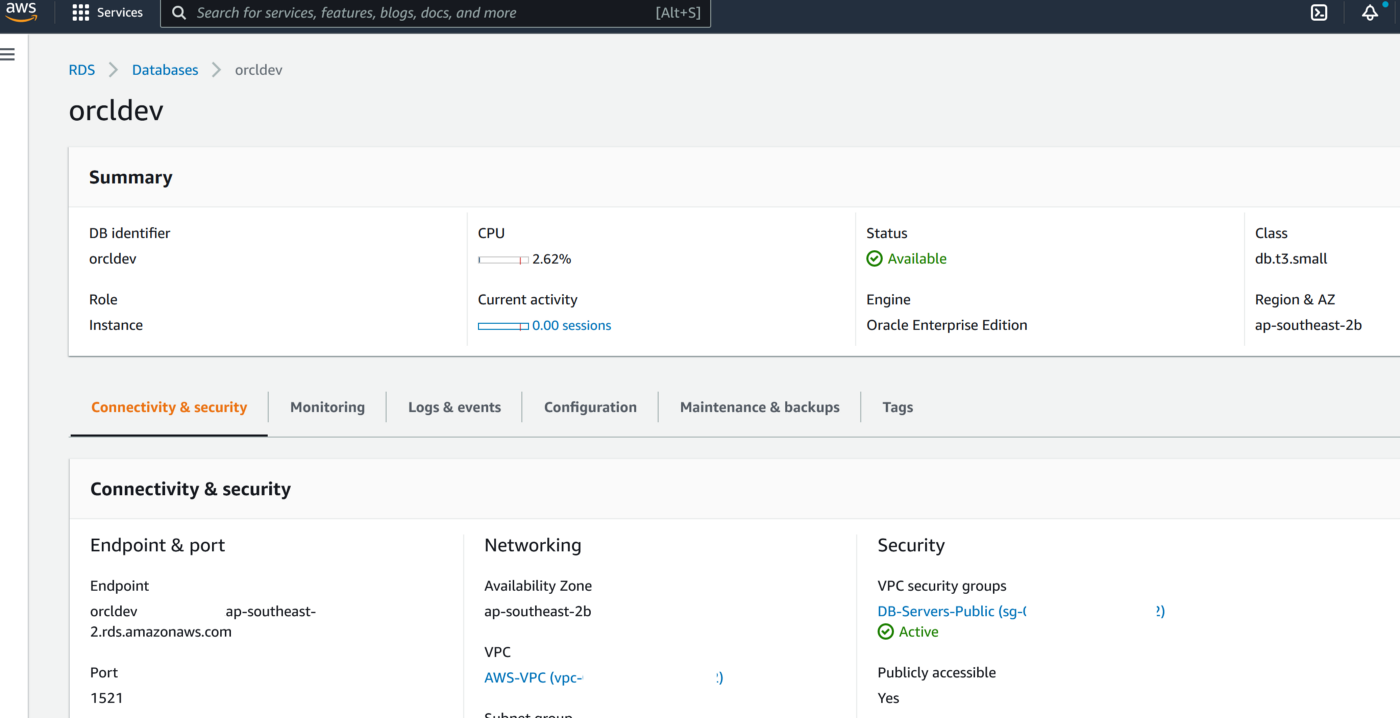
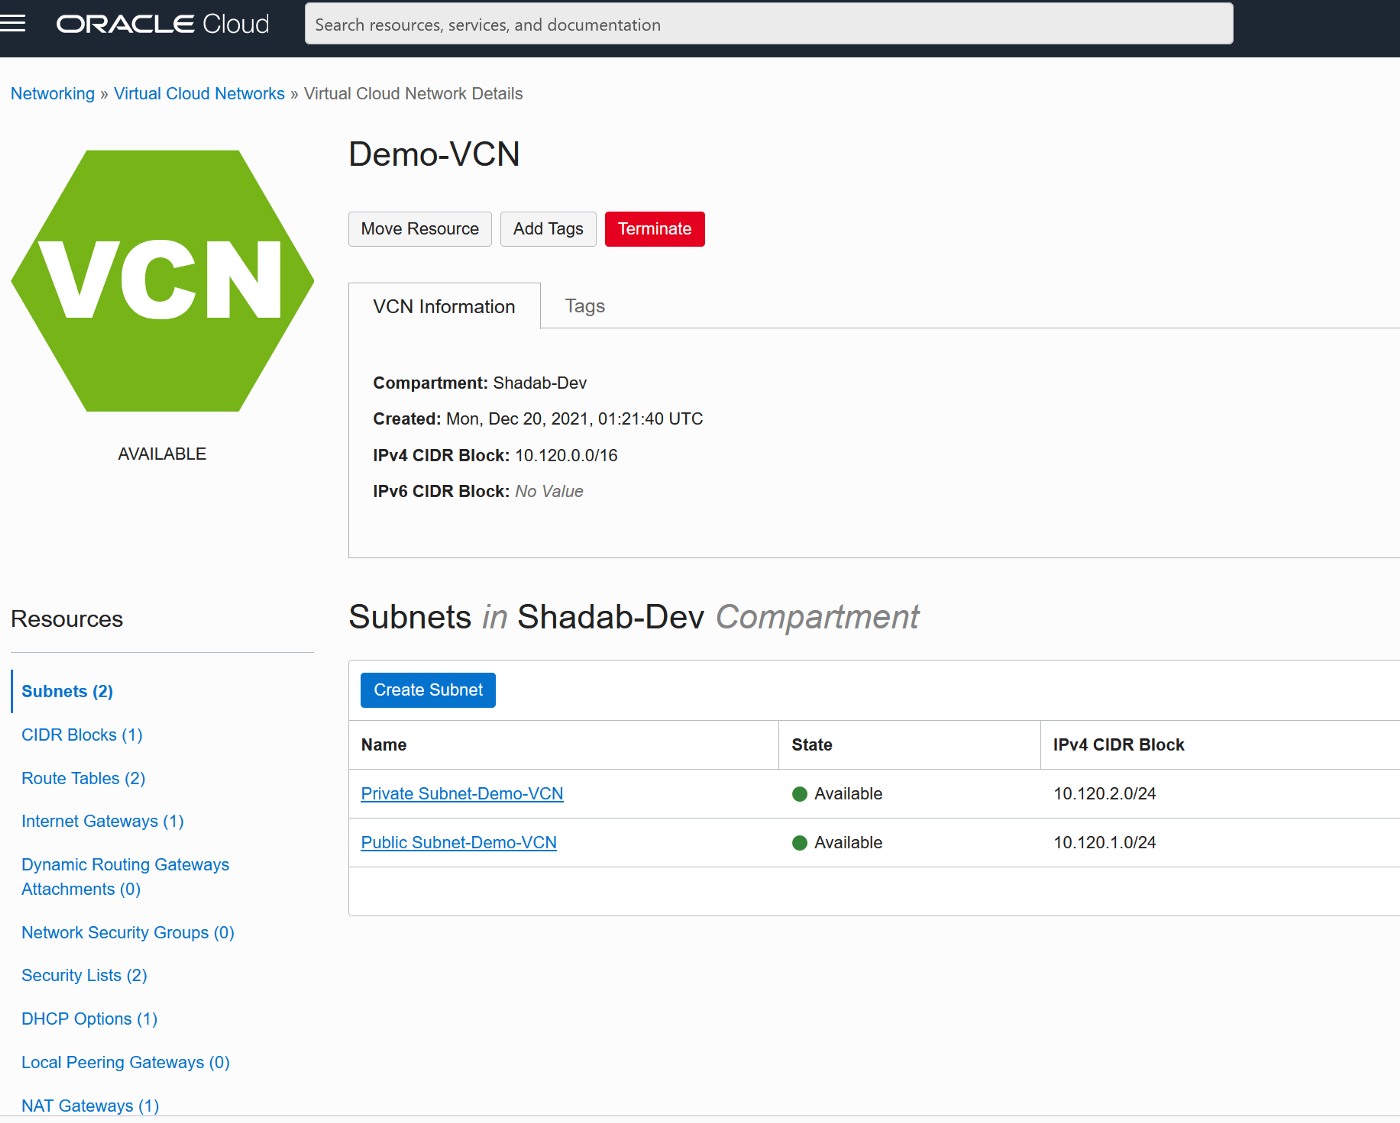
The first part of the setup requires us to provision a VPC, Subnet Group and Oracle 19c RDS Instance on AWS. Please ensure all the requistie Network constructs like security groups are in place for connectivity from OCI Goldengate to RDS. In a production scenario it would be betetr to have the RDS instance without a public endpoint and have a Fastconnect setup from AWS to OCI
Create a VPC and RDS Subnet Group
2. Create RDS Oracle Instance 19.1 EE with super user as ‘admin’
3. Create a new DB Parameter Group for 19.1 EE with parameter ENABLE_GOLDENGATE_REPLICATION set to TRUE
4. Change the parameter group of the RDS instance and reboot the RDS Oracle instance once the parameter group has been applied. Double-check to confirm the parameter ENABLE_GOLDENGATE_REPLICATION is set to True and the correct parameter group is applied to the RDS isntance
5. Set the log retention period on the source DB with ‘admin’ user
grant EXECUTE_CATALOG_ROLE to admin WITH ADMIN OPTION;
commit;
8. Finally, grant the privileges needed by a user account to be a GoldenGate administrator. The package that you use to perform the grant, dbms_goldengate_auth or rdsadmin_dbms_goldengate_auth, depends on the Oracle DB engine version.
— With admin user on RDS Oracle instance for Oracle Database version lower than 12.2 —
— For Oracle DB versions that are later than or equal to Oracle Database 12c Release 2 (12.2), which requires patch level 12.2.0.1.ru-2019–04.rur-2019–04.r1 or later, run the following PL/SQL program.
To revoke privileges, use the procedure revoke_admin_privilege in the same package.
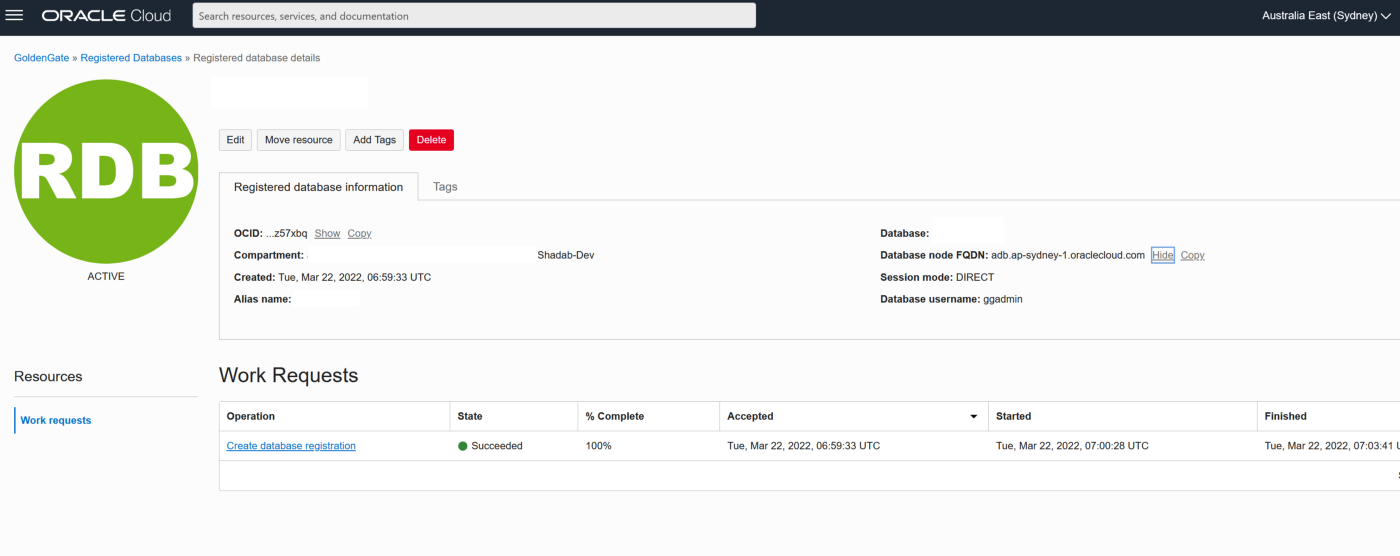
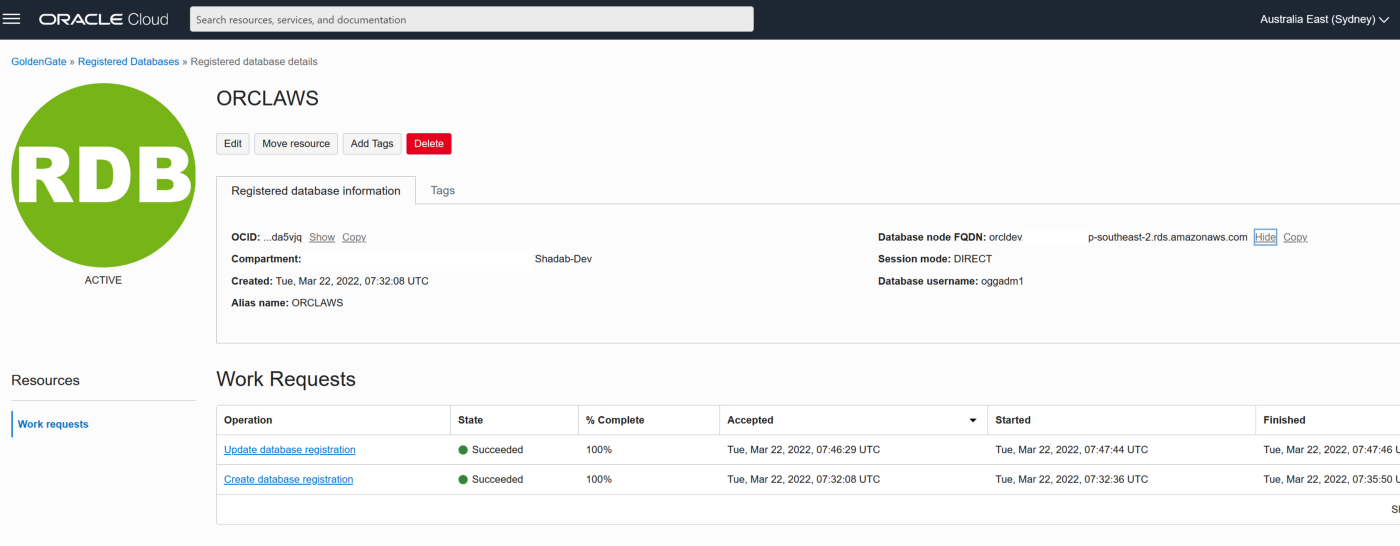
9. TNS entry for AWS RDS Instance
OGGTARGET=(DESCRIPTION=(ENABLE=BROKEN)(ADDRESS_LIST=(ADDRESS=(PROTOCOL=TCP)(HOST=orcl.*****.ap-southeast-2.rds.amazonaws.com)(PORT=1521)))(CONNECT_DATA=(SID=ORCL)))– To be added to Registered Database in OCI –(DESCRIPTION=(ENABLE=BROKEN)(ADDRESS_LIST=(ADDRESS=(PROTOCOL=TCP)(HOST=orcl.****.ap-southeast-2.rds.amazonaws.com)(PORT=1521)))(CONNECT_DATA=(SID=ORCL)))
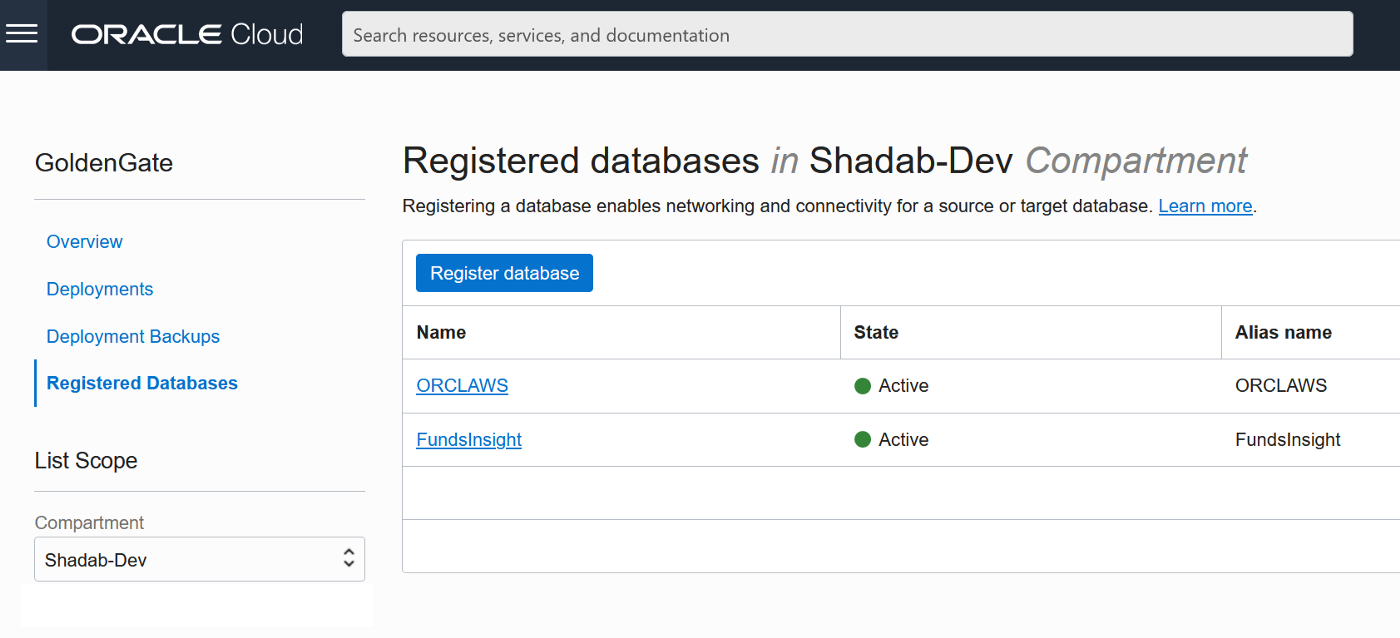
Alias (to be used later in OCI GG configuration) : ORCLAWS
10. Create Test Table in RDS Oracle Instance
CREATE TABLE oggadm1.test (id number,name varchar2(100));
insert into oggadm1.test values (1,’Shadab’);
insert into oggadm1.test values (2,’Mohammad’);
commit;
11. Enable supplemental logging on with Admin user
Phase 4 — Create , Extract (Capture) and Replicat (Apply) and Start the Replication
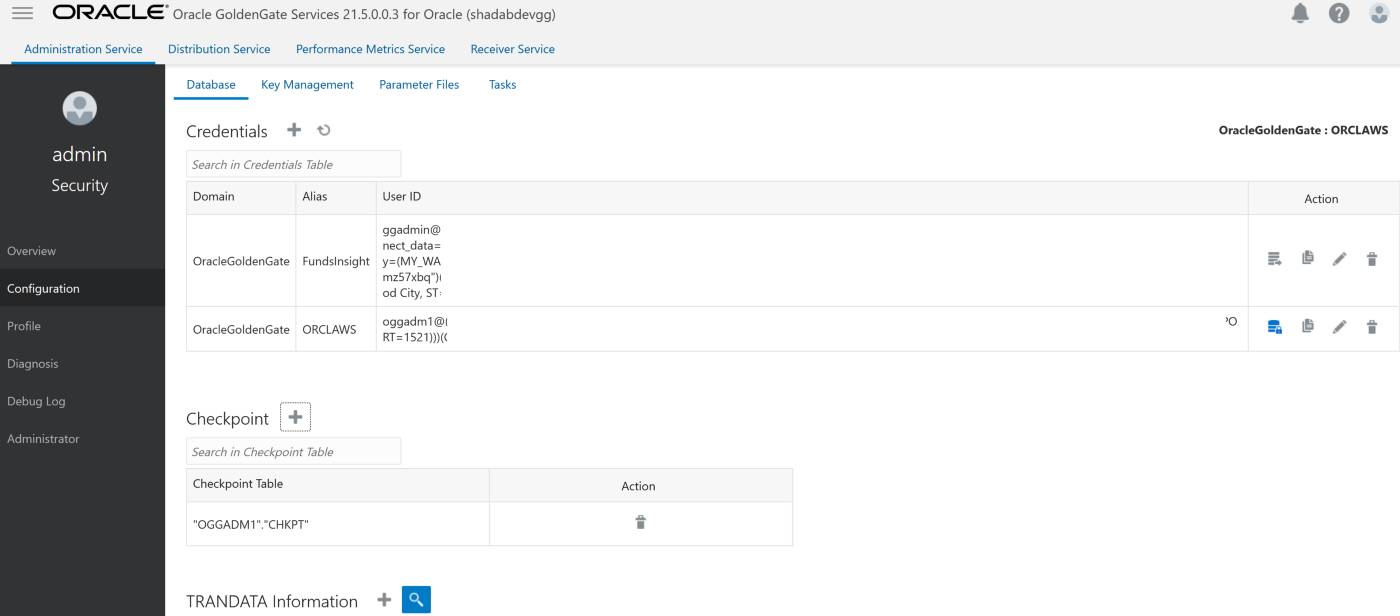
1. Create an Integrated Extract from Administration Service, click on the plus symbol next to the extract section
Go to Main Page > Configuration > Login to AWS RDS instance
a. Create Checkpoint table oggadm1.ckpt
b. Add Tran Data for Schema oggadm1
EXTRACT AWSEXT
USERIDALIAS ORCLAWS DOMAIN OracleGoldenGate
EXTTRAIL AW
TABLE OGGADM1.*;
2. Create Non-integrated replicat for ADB on trail file ‘aw’. click on the plus symbol next to the Replicat section
Go to Main Page > Configuration > Login to ATP instance
a. Create Checkpoint table admin.ckpt
b. Add Tran Data for Schema admin
c. Add heartbeat table
REPLICAT adbrep
USERIDALIAS FundsInsight DOMAIN OracleGoldenGate
MAP OGGADM1.TEST, TARGET ADMIN.TEST;
The status should be green on the OCI Goldengate Administration Dashboard
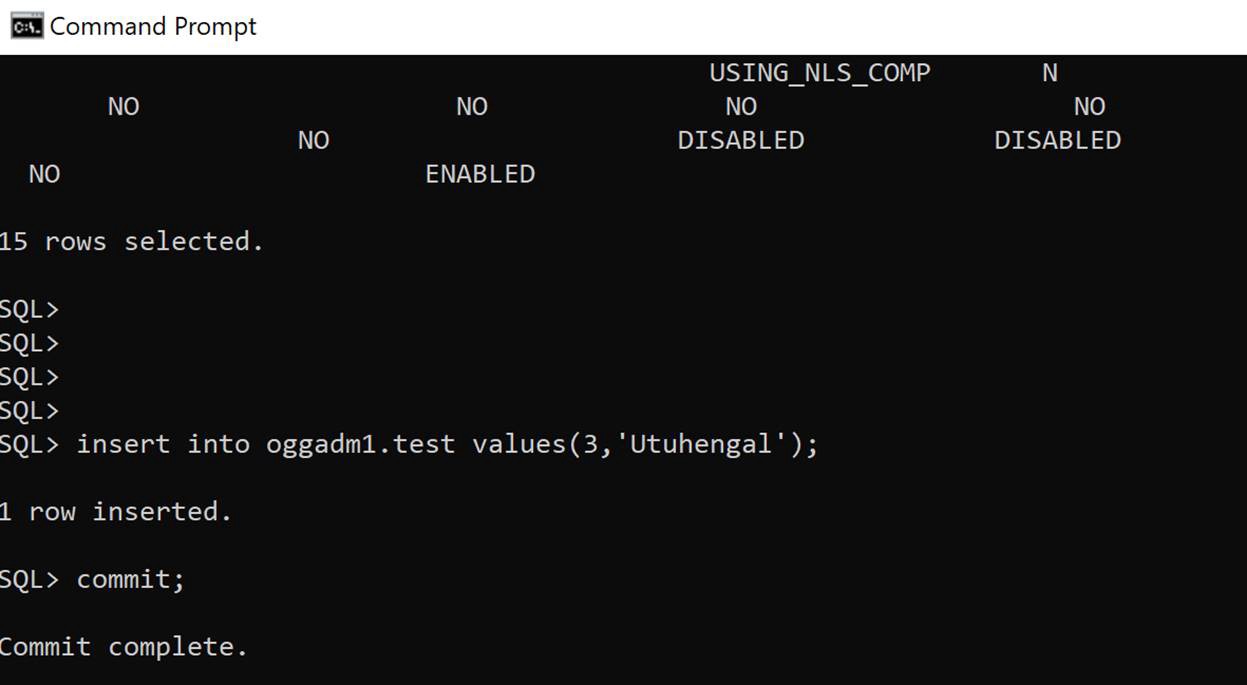
3. Insert transaction at RDS source
insert into oggadm1.test values(3,'Utuhengal');commit;
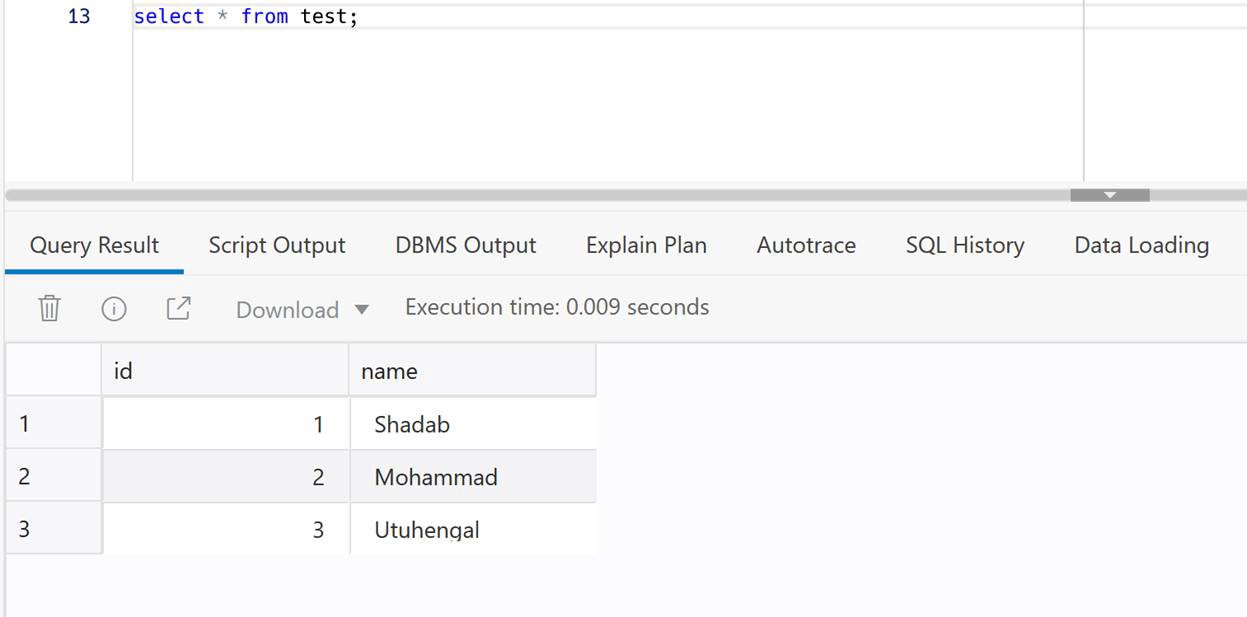
4. Check at ADB Target
select * from test;
Conclusion:
We have created cross-cloud replication from an Oracle Database sitting inside AWS to an Oracle Autonomous Database running on OCI. The idea was to demonstrate the capability and ease of Goldengate Microservices to run a a replication hub on OCI and let you create real-time change data capture across two different public clouds. Every component used in this architecture is a fully managed service without the need of managing any servers or installing any agents on either source or target as they are fully managed cloud services without access to under-lying host.