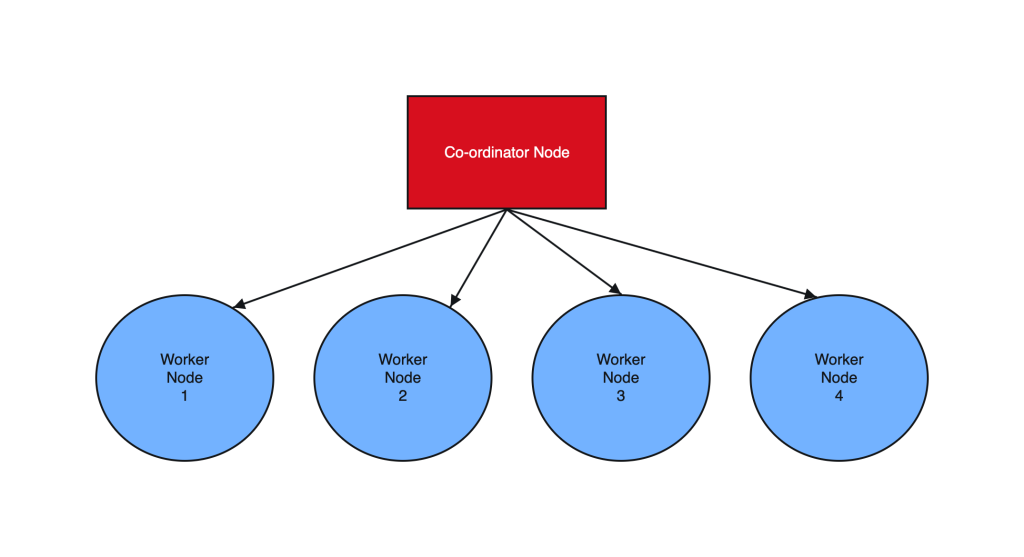
Postgres sharding with Citus is designed to horizontally scale PostgreSQL across multiple nodes. Citus extends PostgreSQL by adding the ability to distribute tables and queries across a cluster of servers.
Tables are horizontally partitioned into smaller, manageable shards that reside on different nodes. Each node contains a subset of the data and Citus intelligently routes queries to the appropriate nodes.
Sharding architecture enhances both read and write scalability, makes it well-suited for applications with growing data volumes and demanding workloads.
________________________ Step by Step Instructions to Setup Postgres Sharding ______________________________
- Create OL8 or RHEL8 Instance and Run the below commands on all Nodes :
a. SSH into all the Instances and configure it as below :
sudo dnf module list postgresql

sudo yum -y install gnupg2 wget vim tar zlib openssl

sudo dnf install https://download.postgresql.org/pub/repos/yum/reporpms/EL-8-x86_64/pgdg-redhat-repo-latest.noarch.rpm

sudo yum -qy module disable postgresql

sudo yum install postgresql14-server -y

sudo yum install postgresql14-contrib -y

## Due to policies for Red Hat family distributions, the PostgreSQL installation will not be enabled for automatic start or have the database initialized automatically

sudo systemctl enable postgresql-14

sudo postgresql-14-setup initdb

sudo systemctl start postgresql-14

sudo systemctl status postgresql-14
b. Enable Postgres user and set Super user password
sudo -iu postgres

psql -c "ALTER USER postgres WITH PASSWORD 'RAbbithole1234#_';"

exit
c. Install Citus community edition binary and Create the Extension
# Add Citus repository for package manager

curl https://install.citusdata.com/community/rpm.sh | sudo bash

sudo yum install -y citus121_14
#Preload Citus and pg_stat_statements extensions on all Nodes

sudo -iu postgres

psql -U postgres -c 'SHOW config_file'

              config_file
----------------------------------------
 /var/lib/pgsql/14/data/postgresql.conf
(1 row)

vim /var/lib/pgsql/14/data/postgresql.conf

## Add below entry and uncomment 'shared_preload_libraries'

shared_preload_libraries = 'citus,pg_stat_statements'

## Note that “citus” has to be the first extension in the list. Otherwise, the server won’t start.

exit

sudo systemctl restart postgresql-14

sudo systemctl status postgresql-14


# Enable auto-start of Postgres 14 server when the server reboots

sudo chkconfig postgresql-14 on

sudo -i -u postgres psql -c "CREATE EXTENSION citus;"
sudo -i -u postgres psql -c "CREATE EXTENSION pg_stat_statements;"
d. Configure connection and authentication
sudo -iu postgres

vim /var/lib/pgsql/14/data/postgresql.conf

# Uncomment listen_addresses and set it as below
listen_addresses = '*'

# Uncomment and change wal_level = 'logical'
wal_level = 'logical'
vim /var/lib/pgsql/14/data/pg_hba.conf

# Change this line to allow all hosts 10.180.2.0/24 with trust
## Important Note : 10.180.2.0/24 is the subnet in which the instances reside. The subnet should have egress and ingress for the Postgres port. Alternately instead of doing a password-less setup, you can also use pgpass file to store the password on all nodes and use the normal authentication method. ##

# IPv4 local connections:
host    all             all             10.180.2.0/24           trust

exit

sudo systemctl restart postgresql-14

sudo systemctl status postgresql-14

## Whitelist Postgres Port##

sudo firewall-cmd --list-ports
sudo firewall-cmd --zone=public --permanent --add-port=5432/tcp
sudo firewall-cmd --reload
sudo firewall-cmd --list-ports
I’ve created a small automation script to perform the above steps. Save it as a .sh file, change the parameters according to your Postgres, citus version and simply execute on all the nodes:
#!/bin/bash

# Function to print commands and exit on failure
function run_command() {
    echo "$ $1"
    eval $1
    if [ $? -ne 0 ]; then
        echo "Error executing command. Exiting."
        exit 1
    fi
}

# Step 1: Install Postgres 14 Server on all Nodes
run_command "sudo dnf module list postgresql"
run_command "sudo yum -y install gnupg2 wget vim tar zlib openssl"
run_command "sudo dnf install -y https://download.postgresql.org/pub/repos/yum/reporpms/EL-8-x86_64/pgdg-redhat-repo-latest.noarch.rpm"
run_command "sudo yum -qy module disable postgresql"
run_command "sudo yum install postgresql14-server -y"
run_command "sudo yum install postgresql14-contrib -y"
run_command "sudo systemctl enable postgresql-14"

# Check if the data directory is empty
if [ -z "$(sudo -i -u postgres ls -A /var/lib/pgsql/14/data)" ]; then
    run_command "sudo postgresql-14-setup initdb"
else
    echo "Data directory is not empty. Skipping initialization."
fi

run_command "sudo systemctl start postgresql-14"
run_command "sudo chkconfig postgresql-14 on"

# Step 2: Enable Postgres user on all Nodes and set superuser password
run_command "sudo -i -u postgres psql -c \"ALTER USER postgres WITH PASSWORD 'YOurPassword1234#_';\""

# Step 3: Install Citus on all Nodes
run_command "curl https://install.citusdata.com/community/rpm.sh | sudo bash"
run_command "sudo yum install -y citus121_14"

# Step 4: Preload Citus and pg_stat_statements extensions on all Nodes
run_command "sudo -i -u postgres psql -U postgres -c 'SHOW config_file'"
run_command "sudo -i -u postgres sed -i -E 's/^#?(listen_addresses[ \t]*=[ \t]*).*/\1'\''*'\''/' /var/lib/pgsql/14/data/postgresql.conf"
run_command "sudo -i -u postgres sed -i -E 's/^#?(shared_preload_libraries[ \t]*=[ \t]*).*/\1'\''citus,pg_stat_statements'\''/' /var/lib/pgsql/14/data/postgresql.conf"
run_command "sudo -i -u postgres sed -i -E 's/^#?(wal_level[ \t]*=[ \t]*).*/\1'\''logical'\''/' /var/lib/pgsql/14/data/postgresql.conf"
run_command "sudo -i -u postgres sed -i -E '/^# IPv4 local connections:/ { n; s/^(host[ \t]*all[ \t]*all[ \t]*)127.0.0.1\/32[ \t]*scram-sha-256$/\10.0.0.0\/0           trust/ }' /var/lib/pgsql/14/data/pg_hba.conf"

# Step 5: Configure connection and authentication on all Nodes
run_command "sudo systemctl restart postgresql-14"
run_command "sudo firewall-cmd --list-ports"
run_command "sudo firewall-cmd --zone=public --permanent --add-port=5432/tcp"
run_command "sudo firewall-cmd --reload"
run_command "sudo firewall-cmd --list-ports"

# Step 6: Create Citus extension on all Nodes
run_command "sudo -i -u postgres psql -c \"CREATE EXTENSION citus;\""
run_command "sudo -i -u postgres psql -c \"CREATE EXTENSION pg_stat_statements;\""

echo "Script execution completed successfully."
2. Create Co-ordinator and Worker nodes
We have now prepared 3 instances for sharding in total. Step 1 should have been performed on all the below instances :
IP HOSTNAME ROLE
10.180.2.45 Postgres-Citus-Coordinator Worker Node
10.180.2.198 Postgres-Citus-Worker-Node-1 Worker Node
10.180.2.86 Postgres-Citus-Worker-Node-2 Worker Node
Execute the below from the Co-ordinator node and run the below commands on the same node
ssh opc@10.180.2.222

# Add co-ordinator node
sudo -i -u postgres psql -c "SELECT citus_set_coordinator_host('10.180.2.45', 5432);"

# Add Worker Nodes
sudo -i -u postgres psql -c "SELECT * from citus_add_node('10.180.2.198', 5432);"
sudo -i -u postgres psql -c "SELECT * from citus_add_node('10.180.2.86', 5432);"


# Check Active Worker Nodes
sudo -i -u postgres psql -c "SELECT * FROM citus_get_active_worker_nodes();"

  node_name   | node_port
--------------+-----------
 10.180.2.198 |      5432
 10.180.2.86  |      5432
3. Create a Distributed table
All steps below to be executed from Co-ordinator node :
CREATE TABLE orders (
order_id    bigserial,
shard_key   int PRIMARY KEY,
n           int,
description char(100) DEFAULT 'x');

# Create Index to further optimize the SQL performance
CREATE UNIQUE INDEX shard_key_idx on orders (shard_key);

# Add Distributed table
SELECT create_distributed_table('orders', 'shard_key');

\timing

# Generate 5 Million rows
INSERT INTO orders (shard_key, n, description)
SELECT
    id AS shard_key,
    (random() * 1000000)::int AS n,
    'x' AS description
FROM generate_series(1, 5000000) AS id
ON CONFLICT DO NOTHING;


#Check the Size of the table using the Citus Table and not Standard Postgres comman
\x
SELECT * FROM citus_tables ;

# Check Explain plan of Query
\x
explain (analyze, buffers, timing) SELECT count(*) from orders;
explain (analyze, buffers, timing) SELECT count(*) from orders where shard_key=2 ;
4. Add another node by performing all commands in Step 1. and add it to the cluster
IP : 10.180.2.17
Run from the Co-ordinator node
sudo -i -u postgres psql -c "SELECT * from citus_add_node('10.180.2.17', 5432);"

sudo -i -u postgres psql -c "SELECT * FROM citus_get_active_worker_nodes();"

  node_name   | node_port
--------------+-----------
 10.180.2.198 |      5432
 10.180.2.86  |      5432
 10.180.2.17  |      5432
(3 rows)

# Add .pgpass file on co-ordinator node and add the DB details >> hostname:port:database:username:password
vim /var/lib/pgsql/.pgpass

localhost:5432:postgres:postgres:YOurPassword1234#_

chmod 600 .pgpass

# Re-balance the shards without downtime
psql -U postgres -h localhost

ALTER SYSTEM SET citus.max_background_task_executors_per_node = 2;
SELECT pg_reload_conf();
SELECT citus_rebalance_start();

NOTICE:  Scheduled 10 moves as job 1
DETAIL:  Rebalance scheduled as background job
HINT:  To monitor progress, run: SELECT * FROM citus_rebalance_status();
 citus_rebalance_start
-----------------------
                     1

#Check Status of rebalancing
SELECT * FROM citus_rebalance_status();

      1 | running | rebalance | Rebalance all colocation groups | 2023-12-24 09:44:16.813663+00 |             | {"t
asks": [{"LSN": {"lag": null, "source": "0/371A5128", "target": null}, "size": {"source": "29 MB", "target": "26 MB
"}, "hosts": {"source": "10.180.2.198:5432", "target": "10.180.2.17:5432"}, "phase": "Catching Up", "state": "runni
ng", "command": "SELECT pg_catalog.citus_move_shard_placement(102012,2,4,'auto')", "message": "", "retried": 0, "ta
sk_id": 4}], "task_state_counts": {"done": 3, "blocked": 6, "running": 1}}
(1 row)

#Once completed the output will be as below :

SELECT * FROM citus_rebalance_status();

 job_id |  state   | job_type  |           description           |          started_at           |          finishe
d_at          |                     details
--------+----------+-----------+---------------------------------+-------------------------------+-----------------
--------------+--------------------------------------------------
      1 | finished | rebalance | Rebalance all colocation groups | 2023-12-24 09:44:16.813663+00 | 2023-12-24 10:18
:24.886163+00 | {"tasks": [], "task_state_counts": {"done": 10}}

# Check the Shard views
SELECT * from pg_dist_shard;
SELECT * FROM citus_shards;

#Misc rebalancing SQL queries
select get_rebalance_table_shards_plan();
SELECT citus_set_default_rebalance_strategy('by_disk_size');
SELECT * from citus_remote_connection_stats();


